
Build a Twin with AI
An AI assistant can follow Your First Twin from CAD for you. It identifies and names the parts, builds axes with drives, and checks each axis by moving it. Watch its work in the viewer and step in at any time.
The assistant connects through the Model Context Protocol (MCP). It runs on your machine. realvirtual CONNECT runs on the same machine and passes its tool calls to the viewer in your browser. The viewer executes the calls. The model file is not uploaded, and CONNECT is not reachable from the internet. What the assistant reads from the twin goes to its AI service, as with any other request.
What you need
Section titled “What you need”- realvirtual CONNECT — the free gateway for Windows. Download it, start it, and complete the one-time free registration. It needs no installer and no admin rights.
- An MCP assistant — this page uses Claude Code. Claude Desktop also works, but needs a small relay. See AI Assistant (Bridge).
- A viewer with the editor — for building twins, the public demo or your licensed deployment. The viewer that CONNECT serves on
localhost:5100operates twins but does not contain the editor.
1. Register the endpoint with your assistant
Section titled “1. Register the endpoint with your assistant”CONNECT’s MCP endpoint is on by default:
http://localhost:5100/mcpIn Claude Code, add it once:
claude mcp add --transport http realvirtual-CONNECT http://localhost:5100/mcpOr put it into the project’s .mcp.json:
{ "mcpServers": { "realvirtual-CONNECT": { "type": "http", "url": "http://localhost:5100/mcp" } }}Restart the assistant to load the server setting. To copy the address later, click Copy Endpoint URL in CONNECT’s tray menu.
2. Switch on the AI Bridge in the viewer
Section titled “2. Switch on the AI Bridge in the viewer”Open the viewer and click AI Bridge in the left tool strip. Select CONNECT under Connect to.
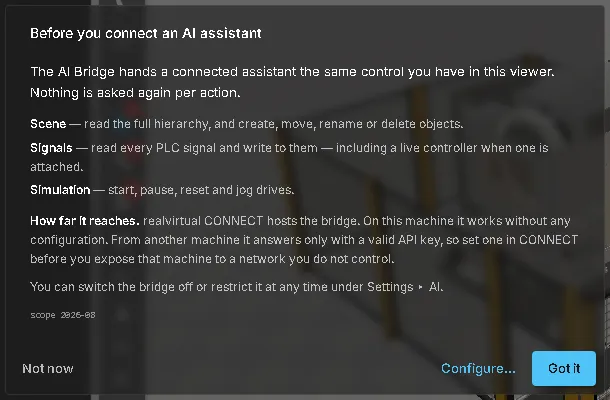
The first time on a device, a dialog explains the assistant’s access to the scene, all signals and the simulation. This includes writing signal values. Read the dialog and confirm with Got it.
For the hosted demo, CONNECT also asks once in the tray whether https://web.realvirtual.io may use the bridge. Allow access. CONNECT remembers your choice. This prompt does not appear for a page served by CONNECT itself.
3. Check that it is connected
Section titled “3. Check that it is connected”Check these two rows in the AI Bridge panel:
- AI client names your assistant and confirms that it is connected.
- Tools is not zero. It is the number of tools this viewer offers to the assistant.
Then ask the assistant to list the loaded nodes:
What is loaded in the viewer right now? List the nodes at the top level.
While the assistant works, an indicator next to the AI Bridge button shows its current action, for example AI · Node tree.
4. Let it build the twin
Section titled “4. Let it build the twin”Import the CAD file as described in step 2 of the CAD guide. Then ask the assistant:
Open the imported assembly in the Editor and work out what this machine does. Remove helper geometry such as work envelopes. Give the parts descriptive names, then build the kinematic axes with drives. Verify each axis by jogging it and show me a screenshot of every axis in motion. Save when you are done.
A good assistant first reads the viewer’s guide (web_help("kinematize")). It views the model from several sides and measures shapes and rotation axes before creating axes. It checks each axis by moving it, just as you would with Jog.
Each step is an editor undo step. Click Undo to reverse a change.
Specify the result in your prompt and leave the method to the assistant:
| Goal | Prompt |
|---|---|
| Understand an unknown model | Describe this machine: which parts move, around which axes, and what is probably helper geometry? |
| Build one axis | Make the slide a linear axis along its rail and add a drive. Jog it end to end and check nothing collides. |
| Materials | Assign industrial materials: frame painted RAL 7035, guards transparent, fasteners steel. |
| Wire a PLC | List every bindable slot and every signal the running interface offers, match them by their comments, and bind the pairs you are confident about. |
| Plan a line | Switch to the Planner, place a feed conveyor, two buffer sections and a turntable, and connect them at the correct transfer height. |
5. Keep what it learned
Section titled “5. Keep what it learned”An assistant can write a note on the node it belongs to. Notes can describe an axis’s role or limits, or identify a part with a misleading name.
The notes are stored in the saved GLB and appear in the property inspector. They remain available to the next person or AI session. See notes on a node.
Staying in control
Section titled “Staying in control”- The connection is local. CONNECT and the viewer run on your machine, and MCP clients from other machines are refused by default. The assistant sends what it reads from the twin — names, values, screenshots — to its AI service, like any other request you give it.
- Write access is a switch. Use MCP server ▸ Allow write access in the tray menu to make the assistant read-only without a restart.
- Undo works for the AI, too. Editor changes made by the assistant are ordinary undo steps.
- Turn it off with the AI Bridge button. The panel’s Pause stops accepting connections without closing anything.
See also
Section titled “See also”- AI Assistant (Bridge) — the panel, the consent, Claude Desktop and the fallback without a gateway
- AI Clients (MCP) — the tool families, switches and who may reach the endpoint
- Your First Twin from CAD — the same job by hand
- Remote access and security — the access rule behind the endpoint