
The USD files group of the USD menu moves a document between realvirtual WEB and the OpenUSD world. It has three functions: Export USD scene…, Import USD scene… and Apply realvirtual data from USD….
These functions belong to the Commercial edition and are included in the public demo. A Community build shows them as Not in this build. See Editions.
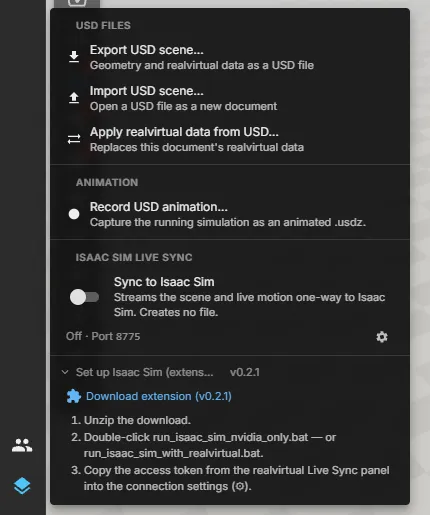
Export USD scene
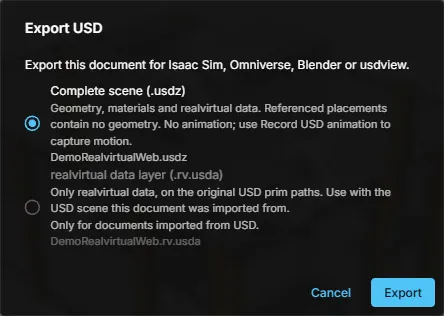
Section titled “Export USD scene”Export USD scene… writes the open document as a USD file. It needs an open document; without one the entry is disabled. The dialog starts with Export this document for Isaac Sim, Omniverse, Blender or usdview. and offers two modes:
| Mode | File | What it contains |
|---|---|---|
| Complete scene | .usdz | Geometry, materials and the realvirtual data (drives, sensors, signals) as customData. Referenced placements contain no geometry. The file has no animation — to capture motion, record a USD animation. |
| realvirtual data layer | .rv.usda | Only the realvirtual data, on the original USD prim paths. Use it together with the USD scene the document was imported from. Available only for documents imported from USD; otherwise the mode is disabled with the note Only for documents imported from USD. |
Pick a mode and click Export. The browser downloads the file.
Placements stay references
Section titled “Placements stay references”A document can contain placements, for example from the planner. The export does not copy their geometry into the file. The dialog warns “{n} placements will be exported without geometry” before you export, and a note repeats it afterwards. The placements are written as empty prims that carry their realvirtual data, so they show up in the receiving tool with geometry only if you bring the referenced assets there as well.
If a vertex colour cannot be combined with a material in the target format, it is approximated, and the note after the export tells how many.
Import USD scene
Section titled “Import USD scene”Import USD scene… opens the import dialog on its USD tab and creates a new document from a USD file. If the file carries realvirtual customData from an earlier export, the import restores it. Settings and limits of the dialog are described under Importing CAD.
Apply realvirtual data from USD
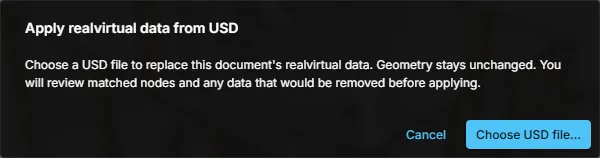
Section titled “Apply realvirtual data from USD”A typical round trip: export the document, change or extend the geometry in Blender or Omniverse, then bring the realvirtual data back. Apply realvirtual data from USD… replaces the realvirtual data of the open document with the data from a USD file. Geometry stays unchanged.
- Choose Apply realvirtual data from USD…. A dialog explains what happens.
- Click Choose USD file… and pick the file. Nothing is changed yet.
- Review the preview: the file name, how many nodes were matched and how many prims are unmatched. Nodes that would lose their data are listed.
- Click Apply data. If nodes would lose data, the button reads Apply and remove missing data, so you confirm the removal explicitly. The document is written and reloaded.
The preview can block the apply:
- Ambiguous prims — some prims cannot be assigned to exactly one node. Nothing can be applied from this file; the dialog lists the prims.
- No realvirtual data in the file — the document has data, but the file has none. The tool that wrote the file most likely dropped
customDataon export. You can still apply, which removes the data of the document, after an explicit confirmation.
Use from an AI assistant
Section titled “Use from an AI assistant”The MCP tool web_export_usd runs the same export (mode standalone or overlay) and writes the result into the open project under exports/. web_import_usd_extras and web_import_usd_extras_commit are the two steps of Apply: preview first, commit second. See AI bridge.
See also
Section titled “See also”- Record a USD animation — export motion as an animated
.usdz. - Isaac Sim live link — stream the running simulation instead of writing a file.
- Importing CAD — the import dialog.