
Training Scenarios
A scenario is a state of the model that students have to diagnose. A typical one: “the signal from the PLC does not arrive”. The teacher shares one link per scenario. Students open it, read the task, look at the PLC and the IO cards, and find the fault.
Scenarios are made of components on nodes of the model. You build them in the editor, with no code.
The building blocks
Section titled “The building blocks”| Component | Purpose |
|---|---|
| Scenario | One exercise: name, task text, which panels students see, optionally a variant that changes fields of the model |
| SignalFault | A fault on one signal. It sits as a child node below a Scenario and is active only while that scenario is active |
| WebIOModule | The IO card picture students use for diagnosis |
| TrainingLock | Locks the document so that it always opens in the student view |
Signal faults
Section titled “Signal faults”A SignalFault has a Target signal and a FaultType:
| FaultType | Effect |
|---|---|
| StuckFalse | The signal is always false (analog: the fixed value) |
| StuckTrue | The signal is always true |
| Frozen | The signal keeps the last value and ignores changes |
| Inverted | The signal is inverted |
| Delayed | Every change arrives later by DelayOn or DelayOff milliseconds |
| Bouncing | A change bounces for BounceDuration milliseconds at the BounceInterval |
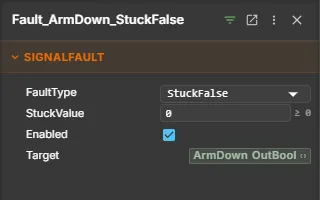
The direction of the signal decides who sees the fault:
- PLC output (for example
ArmDown): the model sees the fault value. The PLC program still sees what it wrote, so the LED on the DO card is on while the arm does not move. - PLC input (for example
ArmIsDown): the PLC sees the fault value, even a real PLC connected through CONNECT. The sensor of the model works, but the PLC never gets its message.
The real value stays available underneath, and delays and bouncing run on the simulation clock. In discrete event simulation they behave the same, because the fault sits in the signal store and not in the animation.
Create a scenario
Section titled “Create a scenario”- Create a node, for example
Scenario - Arm does not go down, and add the component Scenario. - Fill ScenarioName, Description and, if the task should open as a window, tick ShowOpener and write OpenerTitle and OpenerText.
- Add a child node with the component SignalFault. Pick the Target signal and the FaultType.
- Add IO cards with WebIOModule, or generate them with Generate from signals.
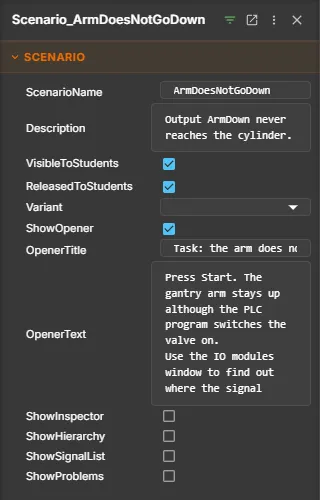
| Property of Scenario | Description |
|---|---|
| ScenarioName | The name used in the link. Defaults to the node name |
| VisibleToStudents | Show the name to students. Off keeps the title of the exercise a secret |
| ReleasedToStudents | The scenario appears in the student list of a locked document |
| Variant | A variant of the document that is applied while the scenario is active |
| ShowOpener, OpenerTitle, OpenerText | A task window that opens when the scenario starts. Students can reopen it with the Task button |
| ShowInspector, ShowHierarchy, ShowSignalList, ShowProblems | Group Student view: which panels students may see. All off by default |
Only one scenario is active at a time. Without a scenario in the link, none is active and the model behaves as usual.
Share a link
Section titled “Share a link”One link per scenario, in the form
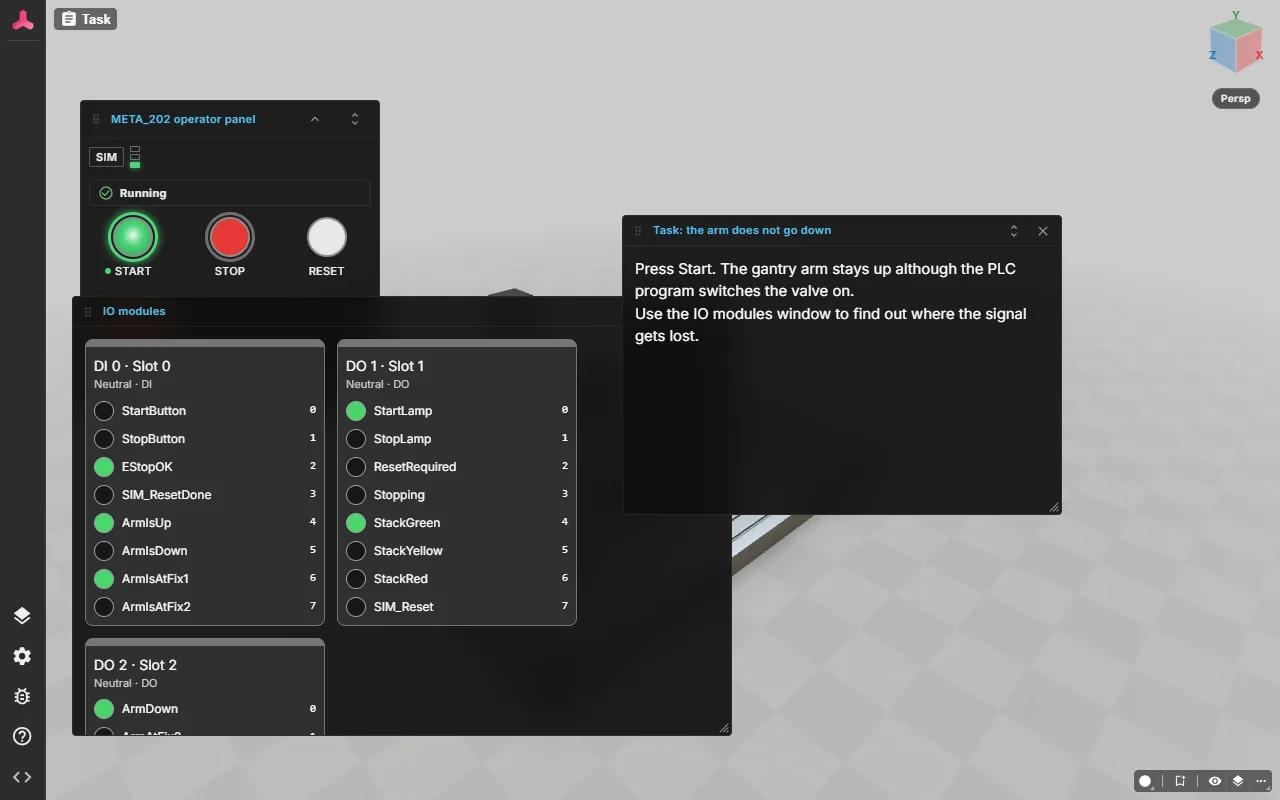
<viewer address>/?doc=<document>&scenario=<ScenarioName>&mode=studentWith mode=student the viewer shows the reduced student view: no scenario switcher, no force markers, no scenario or fault components in the hierarchy and Inspector, no variant management. Students see the model, the operator panel and the IO modules window.
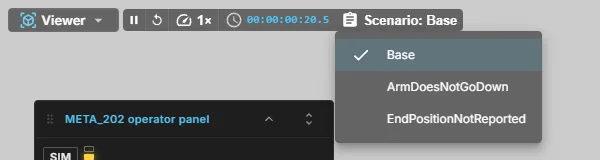
As the teacher, open the document without mode=student. A scenario switcher in the top bar lets you change between the base state and every scenario.
Students see the task window, the operator panel and the IO modules window, and nothing that gives the solution away.
Lock the document
Section titled “Lock the document”Put a TrainingLock on the root node and tick Locked. From then on every opening without teacher proof lands in the student view, whatever the link says. A link without scenario shows the StartScenario, or a list of the scenarios marked as released.
Two ways to unlock:
- Teacher link. The command
trainingLock.createTeacherLinkcreates a link with a secret key after#tk=. The viewer removes the key from the address bar right after reading it. The link is shown once. - Teacher password.
trainingLock.setTeacherPasswordstores a salted, slow hash of the password. Students use the Teacher button and the password dialog. The proof lasts until the tab is closed.
Continuous simulation and DES
Section titled “Continuous simulation and DES”| Continuous simulation | Discrete event simulation | |
|---|---|---|
| Signal faults | Delay and bounce follow the simulation time | Delay and bounce are events in the event queue |
| Fast forward and step | Not applicable | Faults trigger at the same simulated time as in real-time mode |
| Reset | Faults stay active, real values are re-applied | Same |