
Chain
Chains move components along spline paths or simulation paths for material handling systems, tool changers, and other applications requiring continuous linear motion.
Overview
Section titled “Overview”Chains provide continuous movement of multiple components along a defined path. This is useful for modeling material handling systems or tool changers that are driven by chains. They are always connected to a Drive component that controls the chain’s movement speed and position. Chain elements are automatically created and positioned along the spline during simulation.
You can find a demo scene at Assets/realvirtual/Scenes/DemoChain demonstrating chain functionality.
Basic Concepts
Section titled “Basic Concepts”A chain is always connected to a drive, so the movement of the chain depends on the current drive position and speed. Usually, you should use a Drive with the Axis set to Virtual to move the chain.
One or several Chain Elements are connected to the chain. These Chain Elements are created automatically upon simulation start by the chain. Usually, these chain elements should be Prefabs within your project.
The Chain script requires an IChain implementation on the same GameObject. Use the Unity SplineContainer (via the ChainUnitySpline component) to define the path. The legacy point-and-tangent spline is deprecated — see the warning at the top of this page.
Properties
Section titled “Properties”Settings
Section titled “Settings”Chain Orientation
Section titled “Chain Orientation”Determines whether the chain moves horizontally or vertically.
- Type: Enum (Horizontal, Vertical)
- Default: Horizontal
- Use case: Set based on your mechanical system orientation
Chain Element
Section titled “Chain Element”Prefab used for individual chain elements along the spline.
- Type: GameObject reference
- Default: None
- Use case: Assign your custom chain link or carrier prefab
Connected Drive
Section titled “Connected Drive”Drive component that controls chain movement.
- Type: Drive reference
- Default: None
- Use case: Connect to a Drive with Virtual axis for chain control
Number of Elements
Section titled “Number of Elements”Total number of chain elements created along the spline.
- Type: Integer
- Default: 10
- Range: 1 to 1000
- Use case: Adjust based on spline length and element spacing needs
Start Position
Section titled “Start Position”Offset position along the spline where the first element is placed.
- Type: Float
- Default: 0
- Range: 0 to spline length
- Use case: Adjust starting position for alignment with mechanical systems
Calculate Delta Position
Section titled “Calculate Delta Position”Automatically calculates spacing between chain elements.
- Type: Boolean
- Default: true
- Use case: Enable for even distribution, disable for custom spacing
Scaled On Fixed Length
Section titled “Scaled On Fixed Length”Maintains constant total spline length for external drive positioning.
- Type: Boolean
- Default: false
- Use case: Enable when external drives provide positional data for elements
Performance Optimization
Section titled “Performance Optimization”Burst Compiler Optimization
Section titled “Burst Compiler Optimization”The Chain component supports Unity’s Burst Compiler for dramatically improved performance when simulating large numbers of chain elements. This optimization uses SIMD (Single Instruction, Multiple Data) compilation to native code, providing:
Performance Benchmarks:
- Kinematic elements (MoveRigidBody=false): 29-33x speedup
- Physics elements (MoveRigidBody=true): 19-23x speedup
How It Works
Section titled “How It Works”Burst optimization operates in two modes depending on your chain element configuration:
Kinematic Mode (Maximum Performance)
- Uses Unity’s TransformAccessArray for parallel batch processing
- Ideal for visual chain elements without physics interactions
- Achieves 29-33x performance improvement
- Set MoveRigidBody=false on ChainElements to use this mode
Physics Mode (High Performance)
- Uses traditional Rigidbody updates with Burst-compiled calculations
- Required when chain elements need collider interactions
- Achieves 19-23x performance improvement
- Set MoveRigidBody=true on ChainElements for physics
Setup Instructions
Section titled “Setup Instructions”One-Click Setup (Recommended)
If Burst optimization is not enabled, you’ll see a warning message in the Chain Inspector with performance information and a setup button.
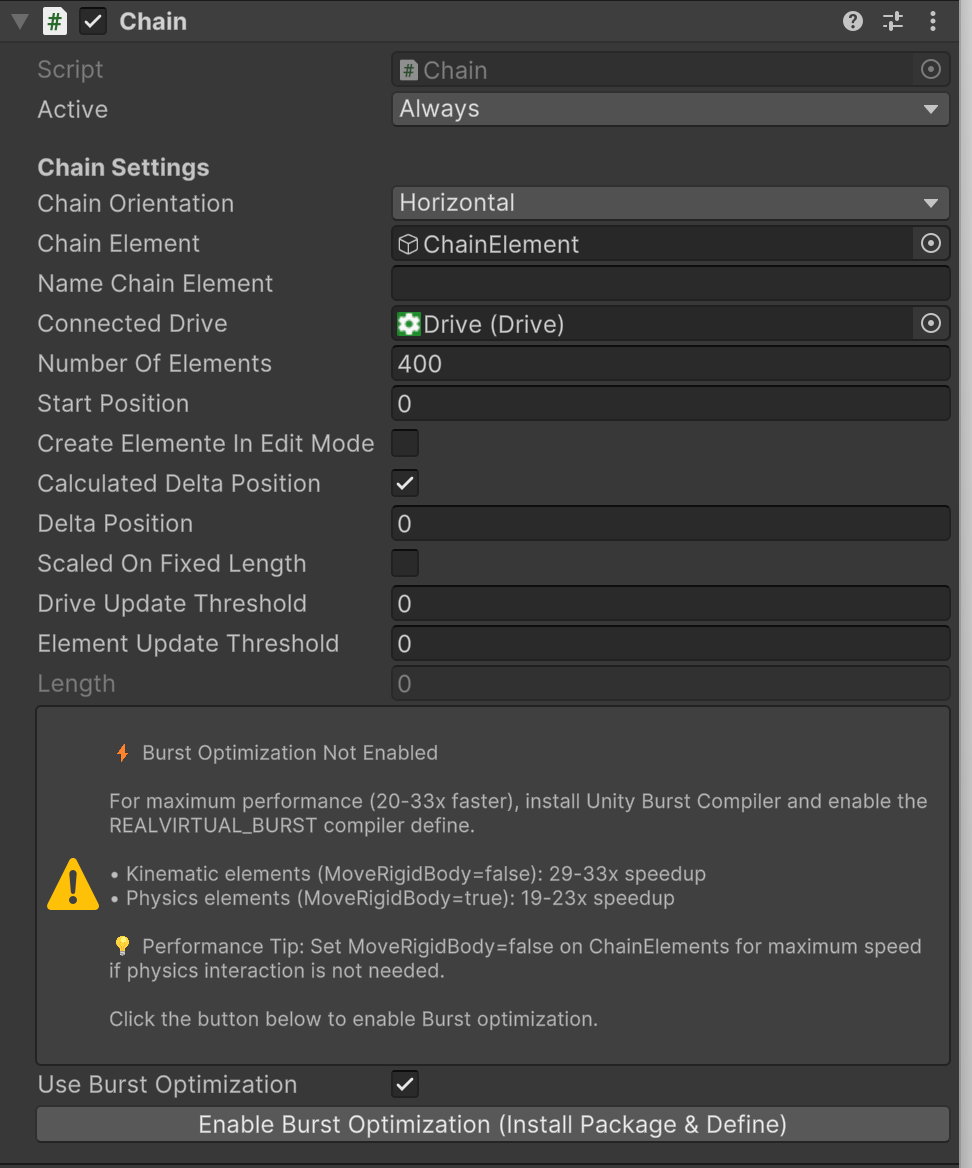
Chain Inspector showing Burst optimization not enabled with one-click setup button
- Click Enable Burst Optimization (Install Package & Define) button in the Chain Inspector
- Unity will automatically:
- Install the Burst Compiler package
- Add
REALVIRTUAL_BURSTto Script Compilation Symbols - Recompile scripts with Burst optimization enabled
- Restart Unity if prompted
Manual Setup
- Install Unity Burst Compiler package via Package Manager
- Add
REALVIRTUAL_BURSTto Project Settings > Player > Script Compilation Symbols - Unity will automatically recompile with Burst optimization
After Setup
Once enabled, the Chain Inspector displays confirmation of active optimization:
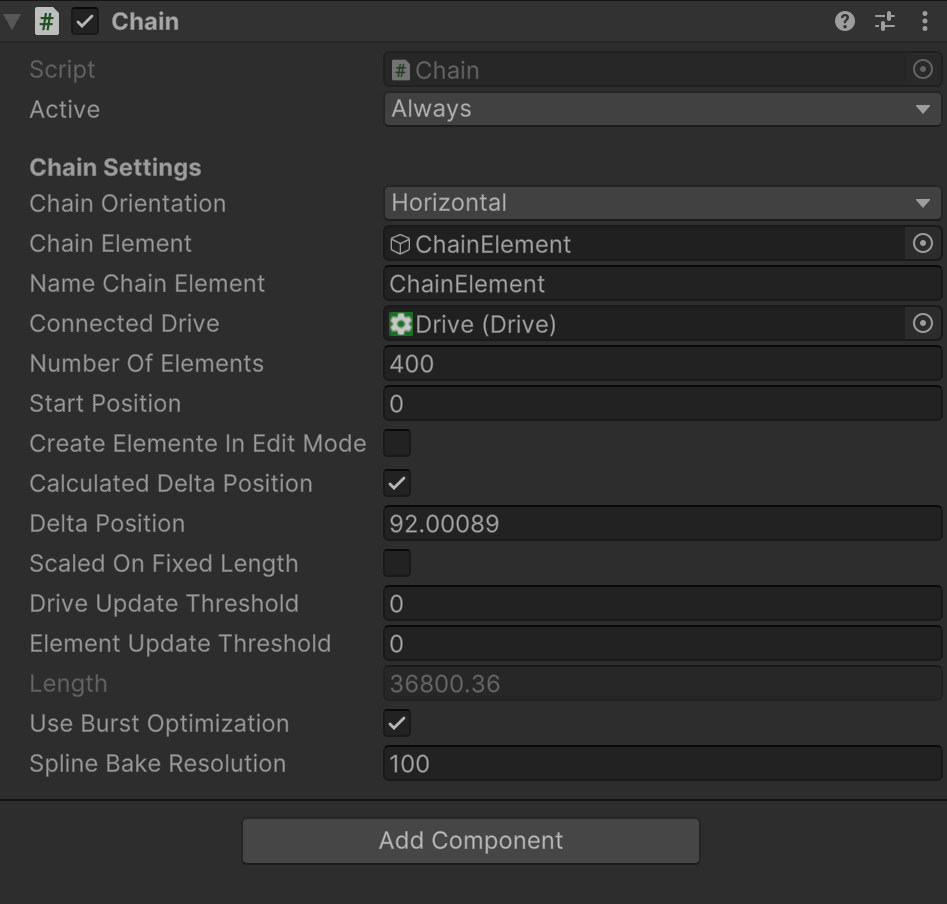
Chain Inspector with Burst optimization enabled showing performance tips
Optimizing Chain Elements
Section titled “Optimizing Chain Elements”For maximum performance, configure your ChainElements based on their purpose:
Visual-Only Elements (Fastest)
- Set MoveRigidBody=false on the ChainElement component
- Use for chain links, carriers, or fixtures that don’t need physics
- Achieves 29-33x speedup with kinematic batch processing
Physics-Interactive Elements
- Set MoveRigidBody=true on the ChainElement component
- Required for elements with colliders that interact with other objects
- Still achieves 19-23x speedup with Burst-optimized physics updates
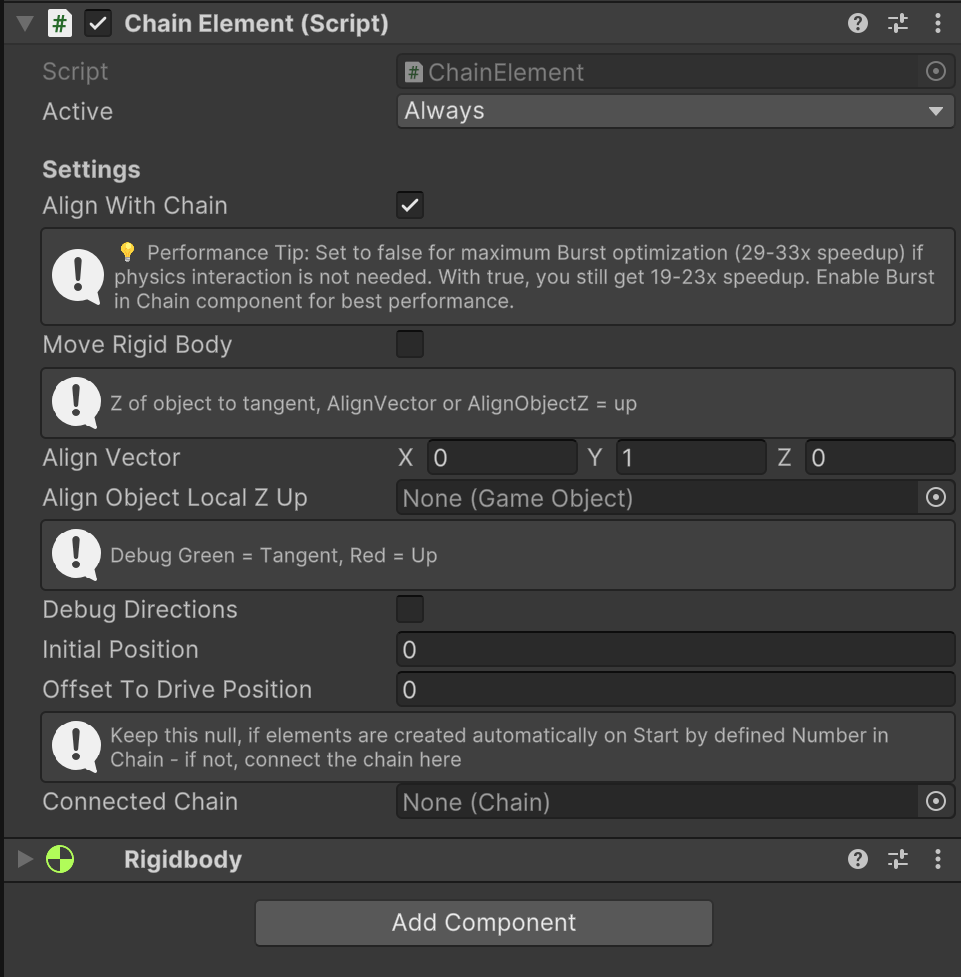
ChainElement Inspector showing MoveRigidBody property with performance guidance
The ChainElement Inspector provides inline performance tips to help you choose the right setting.
Advanced Settings
Section titled “Advanced Settings”Spline Bake Resolution
- Controls the number of pre-calculated spline samples used by Burst jobs
- Higher values = smoother interpolation but more memory usage
- Default: 100 samples
- Adjust based on spline complexity and available memory
Use Burst Optimization
- Enable/disable Burst processing at runtime
- Defaults to enabled when REALVIRTUAL_BURST is defined
- Useful for performance comparisons or debugging
Common Use Cases
Section titled “Common Use Cases”High-Speed Bucket Elevators
- Set MoveRigidBody=false on buckets for 29-33x speedup
- Buckets follow path without physics interaction
- Ideal for material transport visualization
Overhead Conveyors with Load Detection
- Set MoveRigidBody=true on carriers for physics-based load pickup
- Still achieves 19-23x speedup while maintaining collision detection
- Necessary when carriers interact with sensors or parts
Mixed Configuration
- Combine kinematic and physics elements in the same chain
- Use physics only where needed (e.g., pickup/drop zones)
- Optimize performance while maintaining required functionality
Technical Details
Section titled “Technical Details”Burst optimization works by:
- Pre-calculating spline positions and tangents into native arrays
- Batch-processing all element position updates in parallel
- Using SIMD instructions for vectorized calculations
- Minimizing managed-to-native transitions
The system automatically handles:
- Spline position interpolation
- Tangent calculation for element orientation
- Batch updates synchronized with drive events
- Memory management for native arrays
Usage Examples
Section titled “Usage Examples”Basic Chain Setup
Section titled “Basic Chain Setup”- Create a spline path using Unity Splines or custom spline
- Add Chain component to the spline GameObject
- Add ChainUnitySpline component for Unity Splines integration
- Assign Chain Element prefab
- Connect to a Drive component with Virtual axis
- Set Number of Elements based on your requirements
Unity Splines Integration
Section titled “Unity Splines Integration”We recommend using Unity Splines for the chain. To do so, the Unity Splines package must be installed.
Once the Unity Splines package is installed, the chain can be defined as follows:
- In Project Settings > Player, add
REALVIRTUAL_SPLINESunder Script Compilation Symbols to use Unity Splines with realvirtual chains - Right-click in the Hierarchy and select the desired base spline from the Spline menu
- Unity provides a Spline editing mode in the Scene view for adjusting spline control points. For each spline control point, Unity also shows the up direction at the point (red arrow). This is relevant if you want to set up a vertical chain
- Add the ChainUnitySpline and Chain components to the created GameObject
Once the chain is set up, it can be used with ChainElements and drives.
Vertical Chain Configuration
Section titled “Vertical Chain Configuration”To construct a vertical chain, follow these steps:
- Build the spline in the positive Z direction, starting from the bottom-right anchor point, and continue clockwise
- Maintain a vertical angle of exactly 90 degrees. Avoid inclinations to prevent misalignment with interpolated curves representing the height difference
- Note that these instructions are currently applicable only to splines with four anchor points and not more
- Ensure that the front of the chain element also faces in the positive Z direction. This orientation is necessary for the parent GameObject
- Set Chain Orientation to Vertical
💡 Hint
For vertical chains, use exactly four anchor points and maintain precise 90-degree angles to prevent misalignment with interpolated curves.
Editor Tools
Section titled “Editor Tools”Spline Construction (deprecated)
Section titled “Spline Construction (deprecated)”For extending a spline or creating a first point, you can click the Extend button on the Spline. This generates a Point with 2 included Tangent points. You can move these points like any GameObject to construct your spline. The order of these GameObjects also defines the order of the points in the spline. If you select Loop, the spline is closed and the last point is connected to the first point of the spline.
Unity Splines Editor
Section titled “Unity Splines Editor”- Visual spline editing in Scene view
- Control point manipulation with handles
- Up direction indicators (red arrows) for vertical chain setup
- Real-time spline preview and adjustment
See Also
Section titled “See Also”- Chain Element - Individual elements moving along the chain
- Drive - Motor control for chain movement
- Spline documentation - Unity Splines package reference
© 2025 realvirtual GmbH https://realvirtual.io - All rights reserved. No part of this publication may be reproduced, distributed, or transmitted in any form or by any means, including printing, saving, photocopying, recording, or other electronic or mechanical methods, without the prior written permission of the publisher.