
Runtime UI
The Runtime UI will be, if you compile your project to any destination platform, part of your delivered Digital Twin. The Runtime UI can be customized by yourself and extended with the standard Unity UI components if you wish. You can have a preview of the Runtime UI in the Game Window during simulation mode in Unity editor.
The Runtime UI is part of the realvirtual.io prefab. It can be enabled and disabled in the Realvirtual (before 2022 Game4AutomationController), which is a script on the top level of the Realvirtual prefab.
The Runtime UI looks like this:
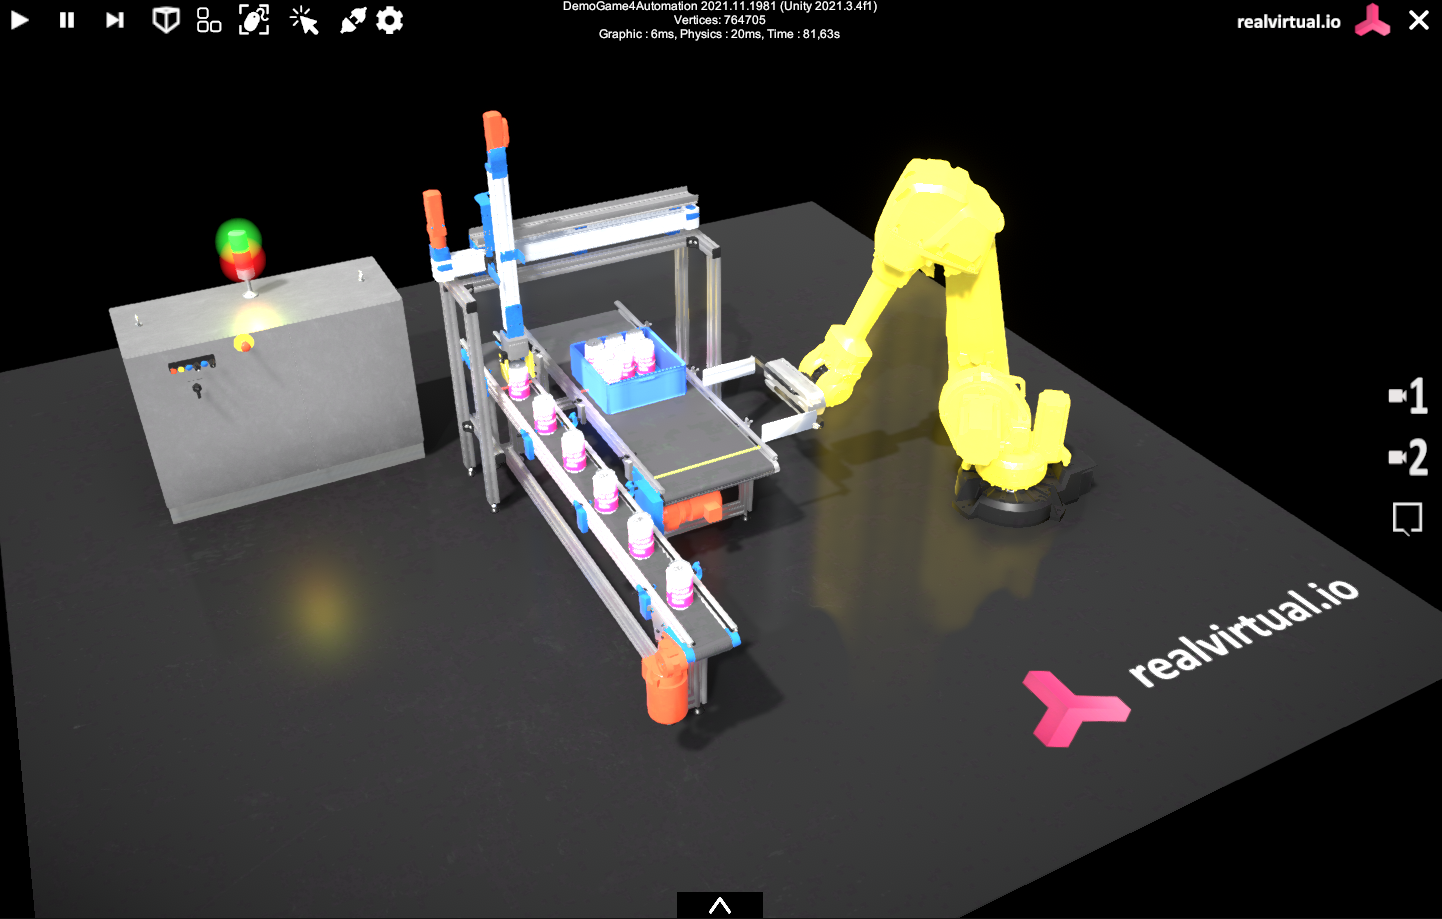
Runtime UI of the Digital Twin
Top Menu
Section titled “Top Menu”
Top menu runtime ui
In the top menu bar of the RuntimeUI you find the following buttons.
| Button | Description |
|---|---|
| Play | Pushing on the play button will restart the simulation |
| Pause | Pauses the simulation |
| Step Forward | Steps one physics step forward |
| Ortohogonal / Perspective | Switches between ortogonal and perspective view |
| Side / Top / Frond View Overlay | Turns on/off the Orthographic side views |
| First Person Controller / CAD controller | Switches between first person controller and cad like mouse controller |
| Object Selection | enables object selection |
| Connection Status | Switches the connection status and displays in green if an interface is connected (see below) |
| Quality Settings | Allows to change the render quality - this only works in Standard Render Pipeline |
If you don’t need the Runtime UI it can be turned off in the Game4AutomationController bei deselecting UI Enabled on Start. It is also possible to turn off certain buttons in the Top Menu by deactivating the Gameobjects.
Connection Status
Section titled “Connection Status” \
If you toggle this button the connection status will be switched between Connected and Disconnected. All realvirtual.io objects which are based on the realvirtual.ioBehavior class can be enabled or disabled based on this connection switch.
The main usecase of this switch is to have one model which can run in Simulation mode, where everything in the model is controlled by included scripts and in Virtual Commissioning (Connected) mode, where some scripts might be disabled and interfaces are enabled. With this option you can decide this on a very detailed level for every component.
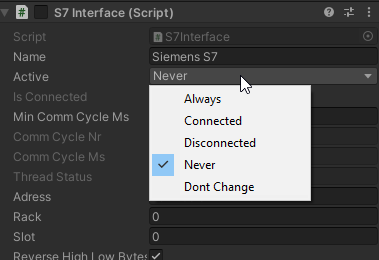
For this all realvirtual.io components have the property Active this property can be one of the following
| Value | Description |
|---|---|
| Always | The script is always active, independent from the connection switch |
| Connected | The script is only active when the connection switch is set to Connected (the plugs are connected) |
| Disconnected | The script is only active when the connection switch is set to Disconnected (the plugs are connected) |
| Never | The script is never active and always disabled |
| Don’t change | The script enabled status is not changed based on the Connection Switch |
If you implement your own behavior components you need to implement your enable and disable logic of your script into the standard methods OnEnable and OnDisable. The interface base classes already have this and call automatically OnConnect() and OnDisconnect().
Object Selection
Section titled “Object Selection”
The object selection enables selection of scene elements and offers options for focusing on and rotating around objects. It can be enabled or disabled by setting the ObjectSelectionEnabled property in the Game4AutomationController.
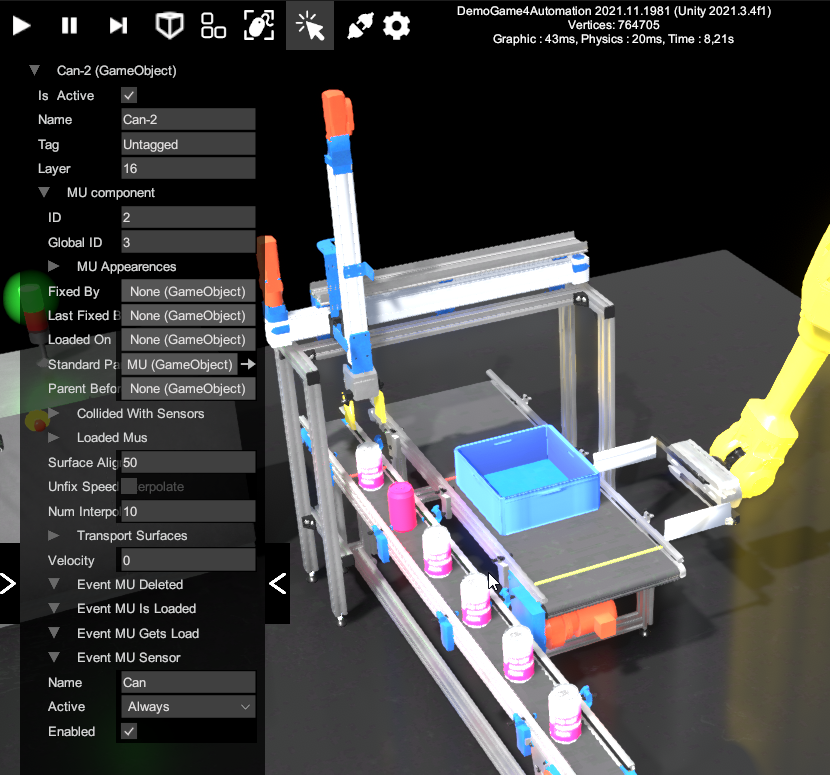
Activated object selection with selected CAN object (with RuntimeInspector enabled in Game4AutomationController)
While navigating the scene with the mouse pointer, moving the pointer over an object will highlight it. By clickon on an object it will get selectid. If the RuntimeInspector is enabled in RealvirtualController the properties of the selected objectare displayed. The “Runtime Inspector” is disabled in the demo model.
| key | action |
|---|---|
| one click left mouse button | object is selected |
| double click left mouse button | object is selected and the camera focus is set |
| F | camera focus is set to the currently selected object |
| right mouse button pressed | rotation around selected object |
| ALT | as long as ALT is pressed the camera will follow the selected object. The selected object is centered and rotation is done around the object |
| ESC | deselect the selected object |
Additional configuration options for object selection can be accessed through the Selection Raycast Component, located on the Main Camera. Within this component, the Highlight Function, Highlight Colors, and Center Icon can be enabled or disabled, and their settings can be modified.
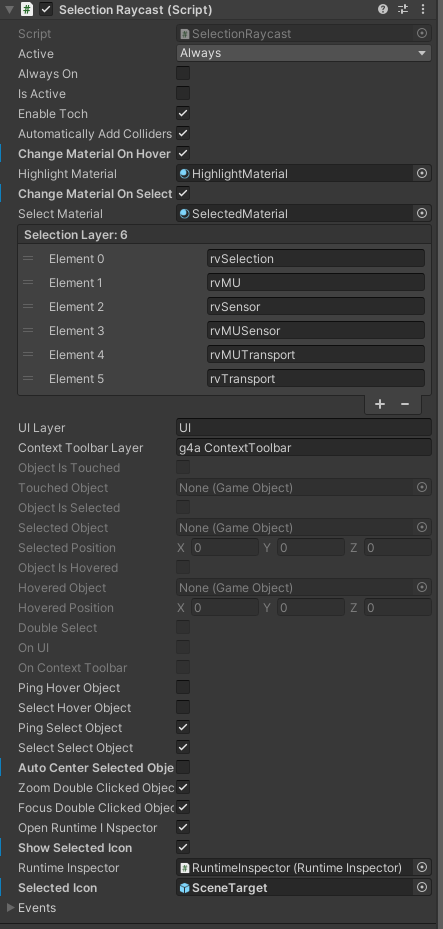
Additional settings for Object Selection in SelectionRaycast component on the main camera.
Camera Positions
Section titled “Camera Positions”Camera positions, perspective settings as well as the settings for the orthographic side views are saved to the current values as soon as you quit the scene. This is done by the CameraPos Scriptable asset. This asset can be assigned in the SceneMouseNavigation, which is attached to the main camera.
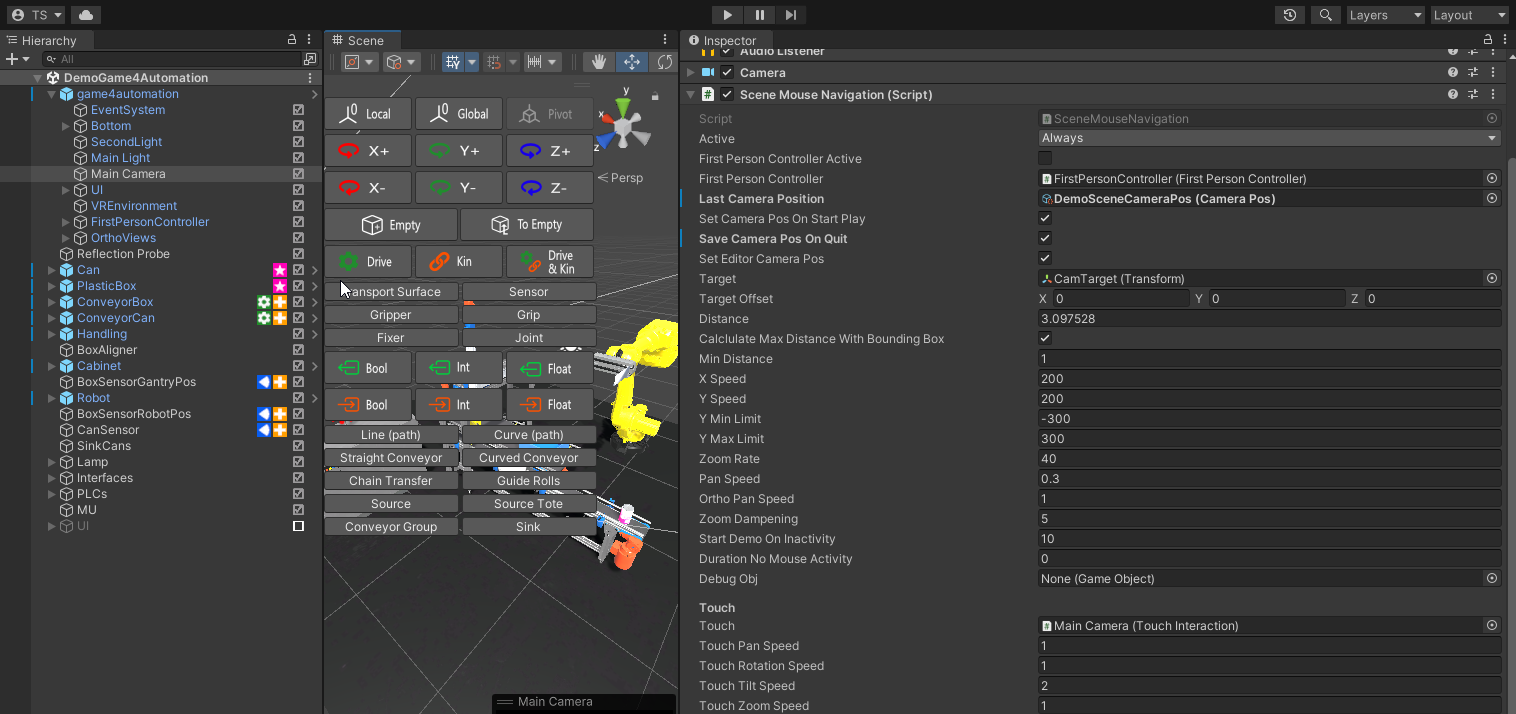
SceneMouseNavigation attached to the main camera, taking care about saved camera positions
If you use a standard Realvirtual (before 2022 Game4automation) component in your scene, all scenes are sharing the same standard camera settings. To create a new camera position setting you need to create a new scriptable component like this:
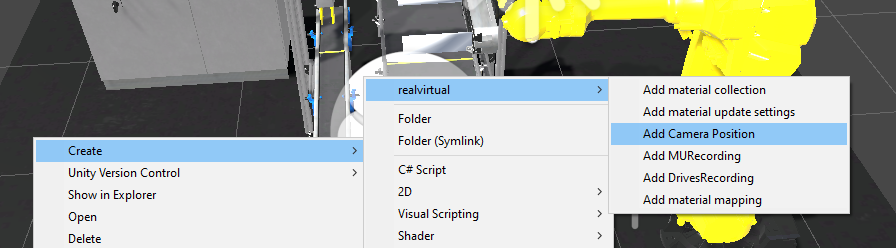
Creating a scriptable component for camera positions
You can save this asset wherever you would like to and assign it to the SceneMouseNavigation.
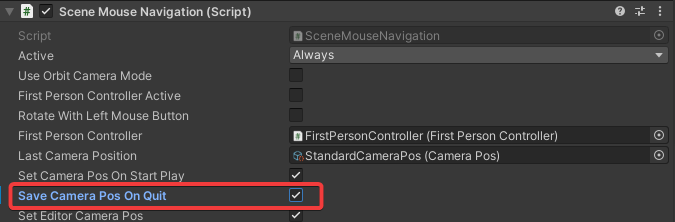
For creating a new camera position or saving the camera position when you leave play mode you should turn on Save Camera Pos On Quit. You need to turn it off again if you don’t want to change the Start Camera Position\
Main Camera
Section titled “Main Camera”You can move the main camera as you are used to it in Unity Editor mode. If you want to change the sensitivity of movement, please change the settings in the SceneMouseNavigation script which is attached to the Main camera.
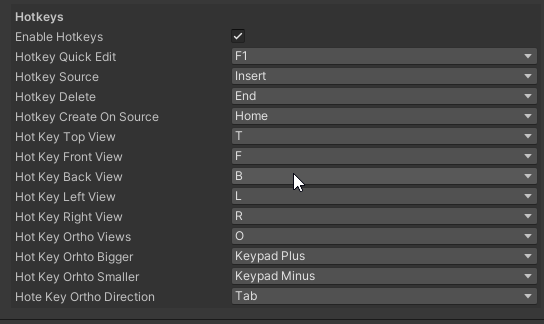
Additionally there are some standard hotkeys (see below) for Front (F), Back (B), Top (T), Left(L) and Right (R) Side view for the main camera.
Orthographic Camera / Side Views
Section titled “Orthographic Camera / Side Views”
Sometimes additional side, top and front views are very handy. This is for example the case, if you would like to teach a robot and have a good view on the current orientation and position. By selecting “O” or by using the Icon in the top menu bar 3 overlay windows are opened with 3 additional orthographic cameras.
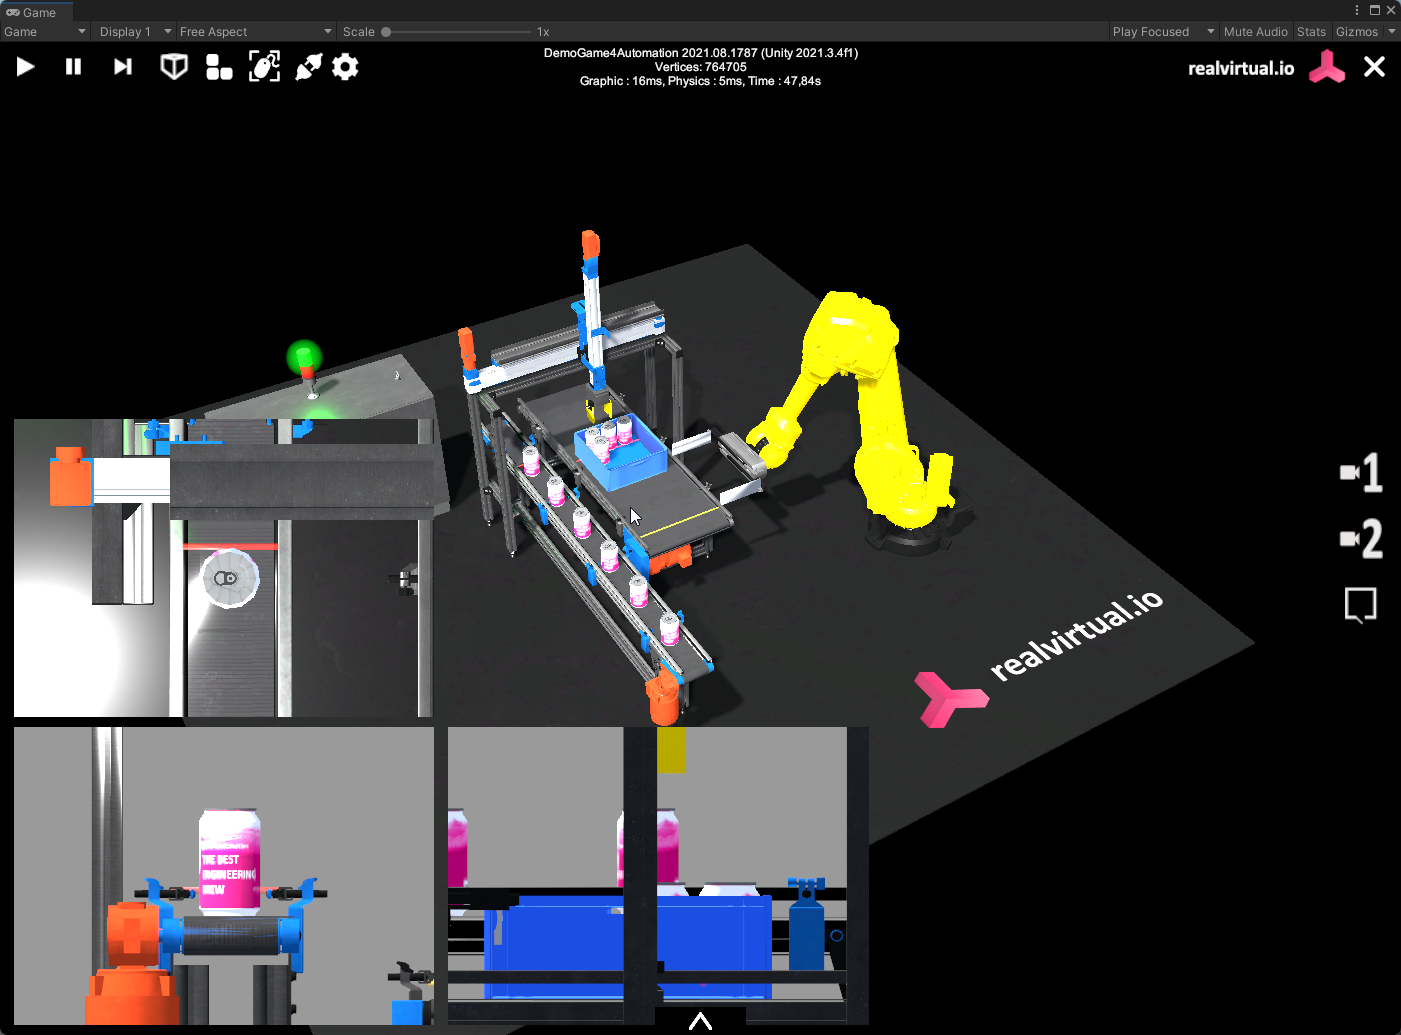
Orthographic views can be turned on with Key "O"
You can move each orthographic view by using the mouse within the view. Pushin “O” again closes the view. With Plus and Minus on the Numpad you can increase the size of the views and with “Tab” you can rotate all the Orthographic cameras by 90 Degrees around the global Y axis..
Hotkeys
Section titled “Hotkeys”Most hotkeys (besides standard camera navigation) are defined within the RealvirtualController (before 2022 Game4AutomationController) You can turn off all hotkeys by deselecting Enable Hotkeys. By selecting None in one hotkey only this hotkey is deactivated.
Scene Navigation
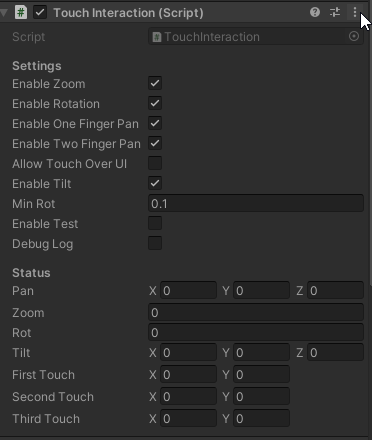
Section titled “Scene Navigation”The scene mouse navigation is controlled by a script which is attached to the Main Camera, which is part of the realvirtual.io prefab. With the SceneMouseNavigation properties you can change the behavior and speed of the mouse navigation.
The touch navigation, which is mainly used for mobile devices, is also attached to the Main Camera. With the properties of the TouchInterface script you can control how the touch interface is behaving.
First Person Controller
Section titled “First Person Controller”New in Version 2019.3 is a included First Person Controller. You can move in the scene like in a First Person Shooter game.
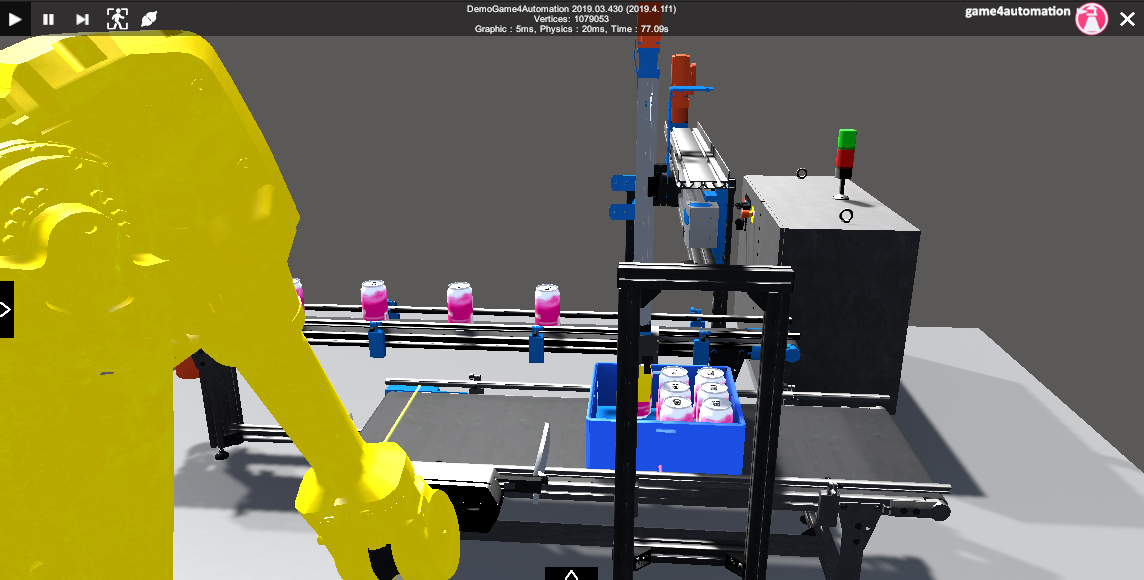
First person view during simulation
The First Person View is enabled and disabled by the button with a mouse or a person in the top bar of the runtime ui.
The first person view is active when the button looks like this:

During the First Person View you can control the view with the following buttons:
| Button / Mouse | Description |
|---|---|
| Mouse movement | changes the direction of the view |
| W | moves forward |
| A | moves left |
| D | moves right |
| S | moves backward |
| Y | person goes into knees |
| Shift | movement is faster |
Runtime Inspector
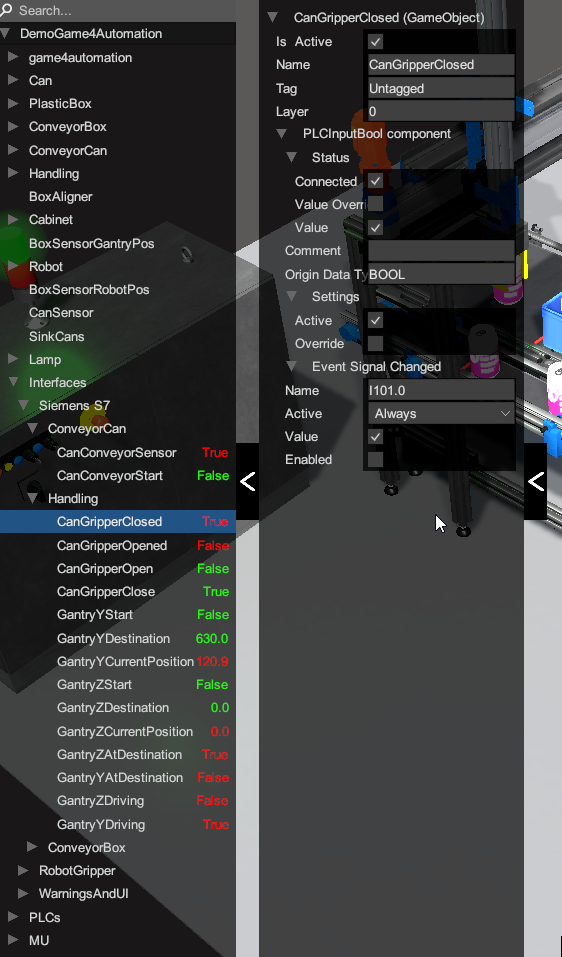
Section titled “Runtime Inspector”The runtime inspector is meant for debugging or inspecting in detail component properties. You can change these properties but the properties are not changed when you leave the simulation mode. This means that the runtime inspector is not meant to replace the Unity Editor. In standard settings the runtime inspector is disabled. You can turn the RuntimeInspector on in the Game4AutomationController settings:
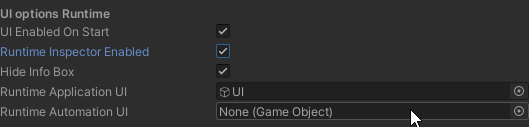
You can open the runtime inspector with the Arrows on the left hand side of your screen:
© 2025 realvirtual GmbH https://realvirtual.io - All rights reserved. No part of this publication may be reproduced, distributed, or transmitted in any form or by any means, including printing, saving, photocopying, recording, or other electronic or mechanical methods, without the prior written permission of the publisher.