
Quick Edit
What’s New in Version 6.0.3
Section titled “What’s New in Version 6.0.3”- New Toolbar Integration: QuickEdit can now be activated via the realvirtual toolbar buttons in Scene View
- Modern UI Toolkit: Complete visual redesign with improved styling
- Better Organization: Components grouped by functionality
- Enhanced Pivot Tools: Integrated MovePivot functionality with dedicated toolbar button
- Improved Performance: Faster rendering and responsiveness
- Dark Theme: Professional dark interface matching Unity’s theme
- Dual Activation: Both toolbar button and F1 hotkey activation methods available
Overview
Section titled “Overview”The QuickEdit overlay is a powerful Scene View tool that provides instant access to essential realvirtual components and functions. The redesigned interface features a modern, dark-themed UI with organized component categories and enhanced pivot tool integration.
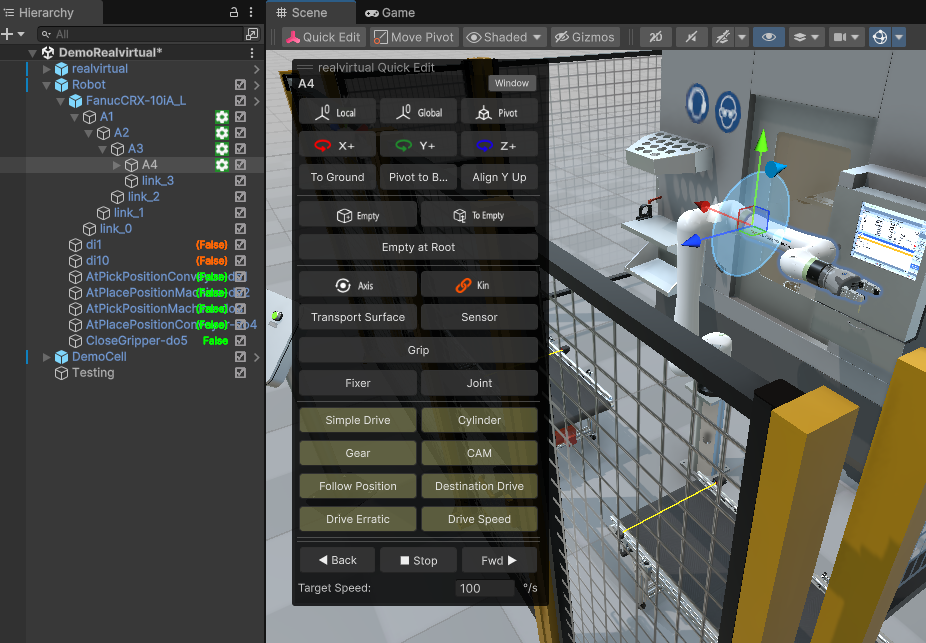
QuickEdit overlay with modern UI Toolkit design and enhanced component organization
Key Features
Section titled “Key Features”Component Categories
Section titled “Component Categories”The new QuickEdit interface organizes components into logical groups:
- Positioning Tools: Local, Global, Pivot controls with X-, Y+, Z+ axis buttons
- Ground Operations: “To Ground”, “Pivot to B…”, “Align Y Up”
- Object Management: “Empty” and “To Empty” for GameObject creation
- Core Components: Transport Surface, Sensor, Axis, Kit
- Interaction: Grip, Fixer, Joint
- Motion Systems: Simple Drive, Cylinder, Gear, CAM, Follow Position, Destination Drive, Drive Erratic, Drive Speed
Enhanced Controls
Section titled “Enhanced Controls”- Pivot Integration: Direct access to pivot manipulation tools
- Speed Control: Target Speed slider with precise value input
- Playback Controls: Back, Stop, Forward buttons for simulation control
- Context-Sensitive: Available functions adapt to selected object(s)
How to Use
Section titled “How to Use”Activation Methods
Section titled “Activation Methods”Method 1: Toolbar Button (New in 6.0.3) The QuickEdit overlay can now be activated via the new realvirtual toolbar in the Scene View:

New realvirtual toolbar with Quick Edit and Move Pivot buttons in Unity Scene View
Method 2: Keyboard Shortcut Press F1 in Scene View to toggle QuickEdit overlay (traditional method)
Usage Steps
Section titled “Usage Steps”- Activation: Click the Quick Edit button in the realvirtual toolbar or press F1
- Selection: Select objects in the Scene View or Hierarchy
- Component Addition: Click component buttons to add to selected objects
- Pivot Control: Use positioning tools for precise object manipulation
- Speed Adjustment: Use the Target Speed slider for drive components
Drive Control Settings
Section titled “Drive Control Settings”When working with Drive components, QuickEdit provides controls for setting up drive parameters that will be used during Play Mode:
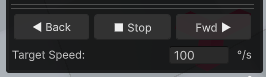
Drive control section for configuring target speed and jog settings for Play Mode
Control Settings
Section titled “Control Settings”- Back (◀): Sets the drive to jog backward when Play Mode starts
- Stop (■): Sets the drive to stop/idle state for Play Mode
- Forward (▶): Sets the drive to jog forward when Play Mode starts
Speed Configuration
Section titled “Speed Configuration”- Target Speed: Sets the target speed value for the selected drive (shown as “100” in mm/s)
- Pre-Play Configuration: Speed setting is applied to the drive component for use in Play Mode
- Units: Speed configured in millimeters per second (mm/s)
Usage for Play Mode Preparation
Section titled “Usage for Play Mode Preparation”- Select Drive: Click on a Drive component in the Scene View or Hierarchy
- Set Speed: Configure the Target Speed value for Play Mode operation
- Set Direction: Choose Back, Stop, or Forward for initial Play Mode behavior
- Enter Play Mode: The drive will use the configured settings when simulation starts
This feature is particularly useful for:
- Play Mode Setup: Configure drive behavior before entering Play Mode
- Speed Configuration: Set target speeds for automation sequences
- Initial State Setting: Define whether drives should jog forward, backward, or remain stopped
- Simulation Preparation: Prepare drive parameters for testing automation logic
QuickEdit in Play Mode
Section titled “QuickEdit in Play Mode”During Play Mode, QuickEdit transforms into a powerful real-time control and monitoring interface, allowing you to interact with drives and control simulation parameters while the automation is running:
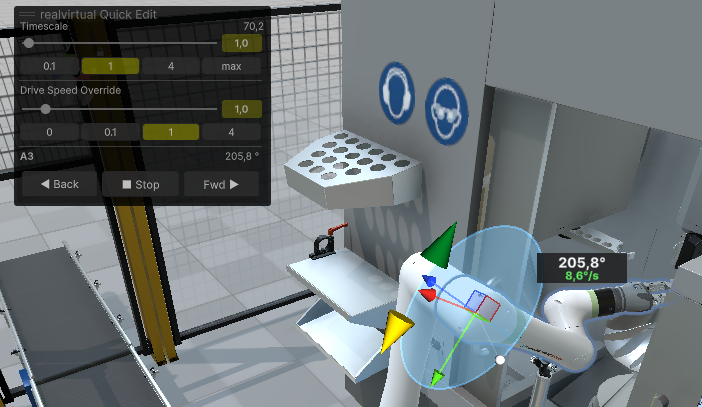
QuickEdit during Play Mode showing active drive controls, timescale adjustment, and real-time drive monitoring
Simulation Controls
Section titled “Simulation Controls”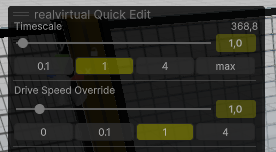
Close-up view of Timescale and Drive Speed Override controls for simulation speed adjustment
Timescale Control
Section titled “Timescale Control”- Timescale Slider: Adjust simulation speed from slow motion to accelerated time (shown: 368.8)
- Current Value Display: Shows current timescale multiplier in real-time
- Slider Range: From 0.1 (slow motion) to max (very fast simulation)
- Real-time Adjustment: Changes apply immediately to entire simulation speed
Drive Speed Override
Section titled “Drive Speed Override”- Global Speed Control: Override all drive speeds with a master multiplier (shown: 1.0)
- Independent Control: Separate from timescale - affects only drive movements
- Slider Range: From 0 (stopped) to max speed multiplier
- Testing Feature: Ideal for testing automation sequences at different drive speeds
Active Drive Monitoring
Section titled “Active Drive Monitoring”Drive Selection and Control
Section titled “Drive Selection and Control”- Drive List: Shows currently selected or active drives in the scene
- Real-time Status: Displays current drive positions and states
- Position Display: Shows exact drive positions (e.g., “A3: 205.8°”)
- Live Updates: Values update continuously during simulation
Manual Drive Control
Section titled “Manual Drive Control”- Back (◀): Manually jog selected drive backward during simulation
- Stop (■): Stop selected drive immediately
- Forward (▶): Manually jog selected drive forward during simulation
- Override Automation: Manual controls can override automated sequences
Real-time Features
Section titled “Real-time Features”Visual Feedback
Section titled “Visual Feedback”- Active Drives: Highlighted drives show which components are currently moving
- Position Indicators: Real-time position values displayed for monitoring
- Status Colors: Visual indicators show drive states (moving, stopped, etc.)
Interactive Control
Section titled “Interactive Control”- Live Adjustment: All controls respond immediately during simulation
- No Pause Required: Adjust parameters without stopping the simulation
- Multi-drive Support: Monitor and control multiple drives simultaneously
Use Cases in Play Mode
Section titled “Use Cases in Play Mode”- Speed Testing: Adjust timescale to observe automation at different speeds
- Drive Override: Take manual control of drives during automated sequences
- Performance Tuning: Test different speed settings in real-time
- Debugging: Stop specific drives to isolate issues during simulation
- Training: Demonstrate system behavior at various speeds
- System Optimization: Fine-tune drive speeds and timing while observing results
Key Differences from Edit Mode
Section titled “Key Differences from Edit Mode”| Feature | Edit Mode | Play Mode |
|---|---|---|
| Drive Controls | Set initial parameters | Real-time drive control |
| Speed Settings | Configure for Play Mode | Active speed override |
| Timescale | Not available | Real-time simulation speed control |
| Position Display | Static values | Live updating positions |
| Purpose | Preparation and setup | Active simulation control |
Configuration
Section titled “Configuration”Aligning Pivot Points
Section titled “Aligning Pivot Points”To align pivot points, you can use the Pivot button. This window will open the Move Pivot window. For more information check the page Move Pivot.
Changing Quickedit Visibility
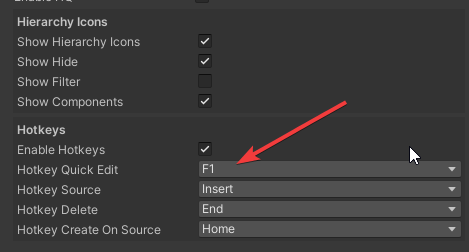
Section titled “Changing Quickedit Visibility”You can toggle the visibility of the Quickedit window on/off using the Hotkey F1. If you wish to change the hotkey, you can do so within the realvirtual.io controller inside the scene.
Prerequisites
Section titled “Prerequisites”- Unity 6000.0.28f1 (Unity 6) or later with realvirtual framework
- Scene must contain a realvirtual.io controller component
- Basic familiarity with Unity Scene View interface
Troubleshooting
Section titled “Troubleshooting”- QuickEdit not appearing: Ensure F1 hotkey is enabled in the realvirtual.io controller settings
- Toolbar buttons missing: Verify Unity 6+ installation and proper realvirtual framework setup
- Drive controls unresponsive: Check that drive components are properly configured and selected
- Outdated interface: Ensure you’re using realvirtual version 6.0.3 or later for the new UI Toolkit design
See Also
Section titled “See Also”- Move Pivot Points (Pro) - Advanced pivot manipulation tools
- Reparenting Tool (Pro) - Hierarchy management
- Runtime UI - Play Mode interface controls