
Installation
Before you dive into the world of realvirtual.io, you’ll need to set up your development environment correctly. Here’s a step-by-step guide to get you started.
realvirtual.io 6.3 (Unity 6.3 LTS)
Section titled “realvirtual.io 6.3 (Unity 6.3 LTS)”Step 1: Install Unity 6.3 LTS
Section titled “Step 1: Install Unity 6.3 LTS”Install Unity 6.3 LTS through the Unity Hub. In Unity Hub, the version number is displayed as 6000.3 (e.g., 6000.3.5f1). For detailed instructions, refer to Unity’s official installation guide.
Step 2: Create a New Unity Project
Section titled “Step 2: Create a New Unity Project”- Open Unity Hub and click New project.
- Select Universal 3D under Core templates to use the Universal Render Pipeline (URP).
- Set a project name and choose a location for the project folder.
- Ensure Editor version 6000.3 (Unity 6.3 LTS) is selected.
- Click Create project.
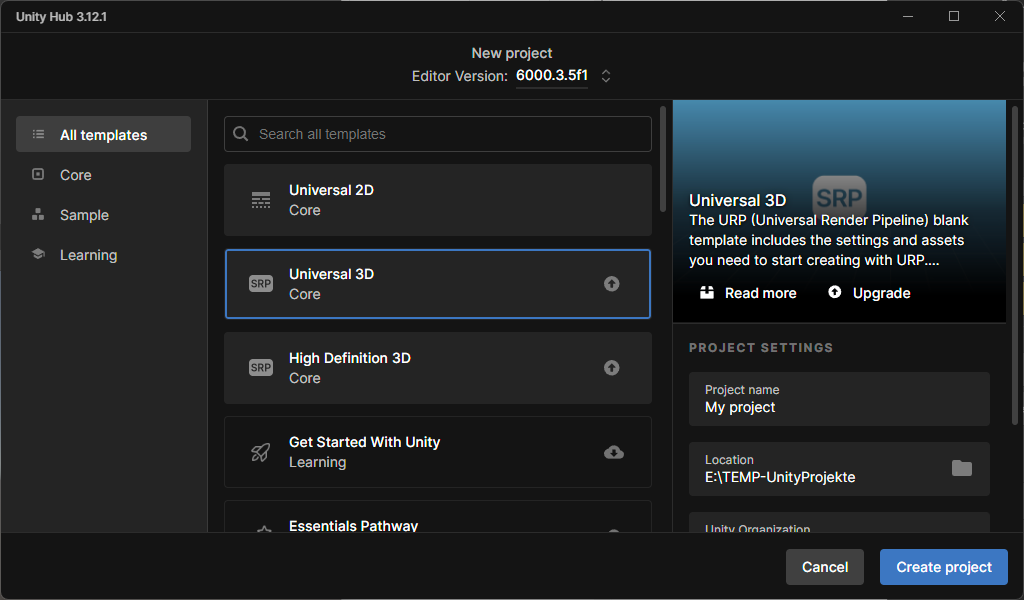
Creating a new Universal 3D project with Unity 6.3 LTS
Step 3: Install realvirtual Packages
Section titled “Step 3: Install realvirtual Packages”The installation depends on where you purchased realvirtual. Choose the section that applies to you.
Purchased from the Unity Asset Store
Section titled “Purchased from the Unity Asset Store”- Open Window > Package Manager in Unity.
- Select My Assets in the left panel.
- Find realvirtual Starter (and realvirtual Professional if purchased) and click Download.
- After downloading, click Import to install the UPM packages into your project.
Purchased directly from realvirtual.io
Section titled “Purchased directly from realvirtual.io”For your first installation, download the .tgz package files from the realvirtual Customer Portal. The link and login credentials are provided on your invoice.
After downloading, install the packages in Unity:
- Open Window > Package Manager.
- Click the + button in the top-left corner and select Install package from tarball….
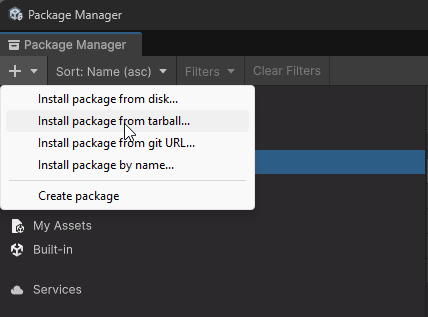
Install package from tarball in Package Manager
- Navigate to the downloaded
.tgzfile and select io.realvirtual.starter first.
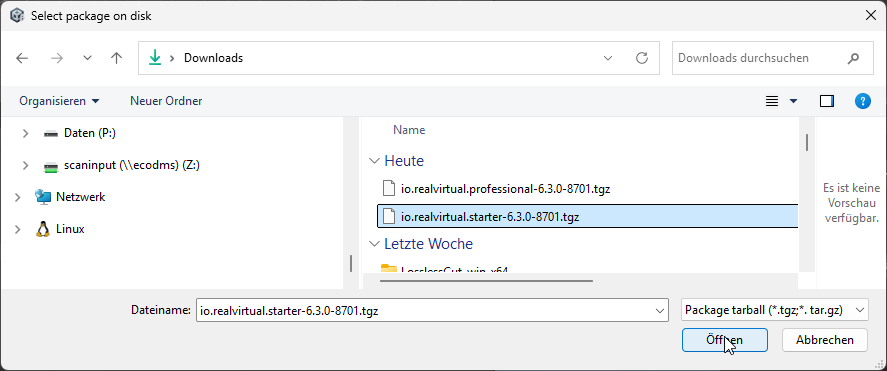
Select the starter package tarball file
- Wait for the import to complete. This may take a few minutes.
- Repeat the process for io.realvirtual.professional if you purchased the Professional edition.
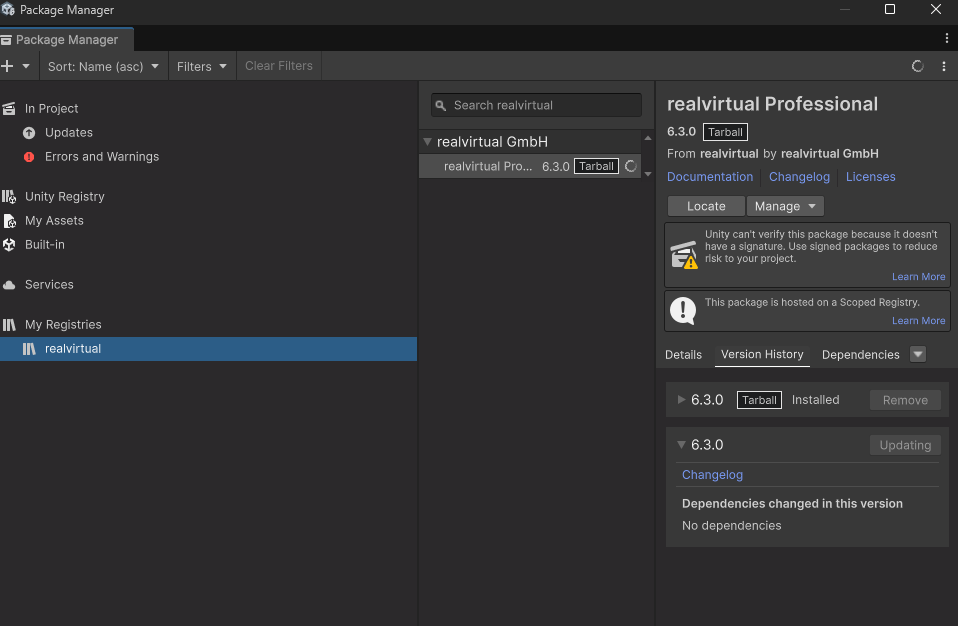
realvirtual Professional installed via tarball in Package Manager
Setting Up User Hub for Future Updates
Section titled “Setting Up User Hub for Future Updates”After installing the packages, the realvirtual menu appears in the Unity menu bar. Use the built-in User Hub to manage updates:
- Go to Tools > realvirtual > User Hub in the Unity menu.
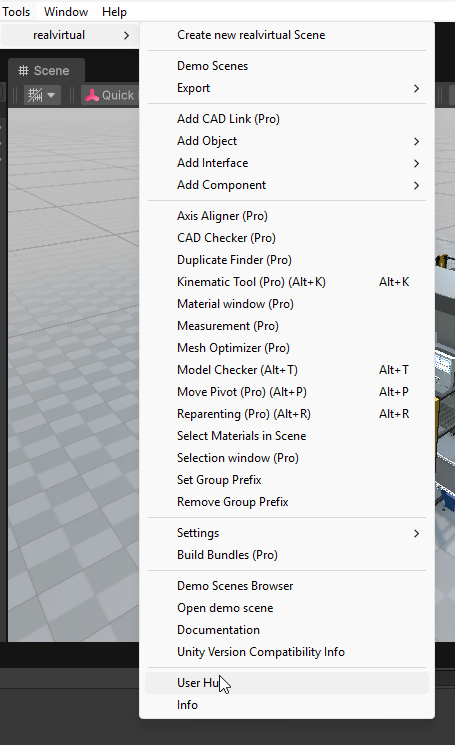
Open User Hub from the realvirtual menu
- In the Login tab, enter your Invoice Number, Billing ZIP Code, and Email. Click Login.
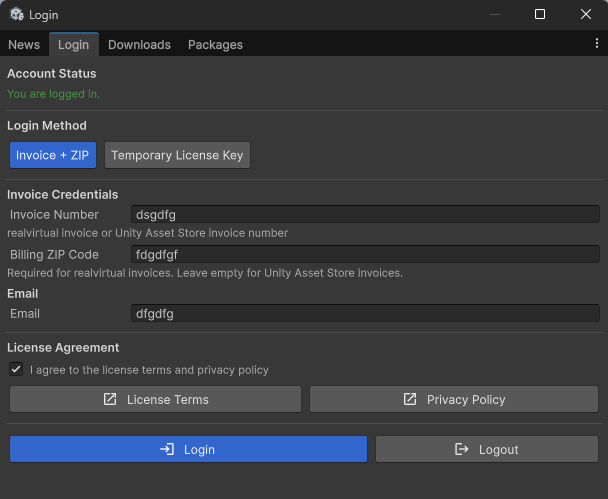
User Hub login with invoice credentials
Activate UPM Registry (Recommended)
Section titled “Activate UPM Registry (Recommended)”To receive automatic update notifications, activate the realvirtual UPM Registry:
- In User Hub, go to the Packages tab.
- Click Activate UPM Registry.
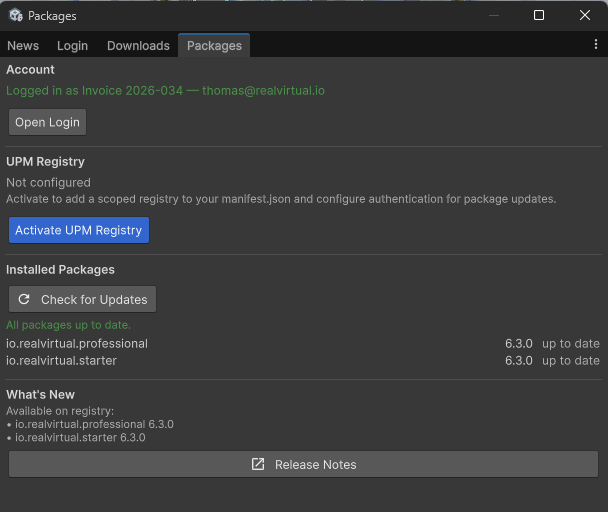
Activate UPM Registry in the Packages tab
- Unity will add a scoped registry to your Project Settings > Package Manager and show a confirmation dialog.
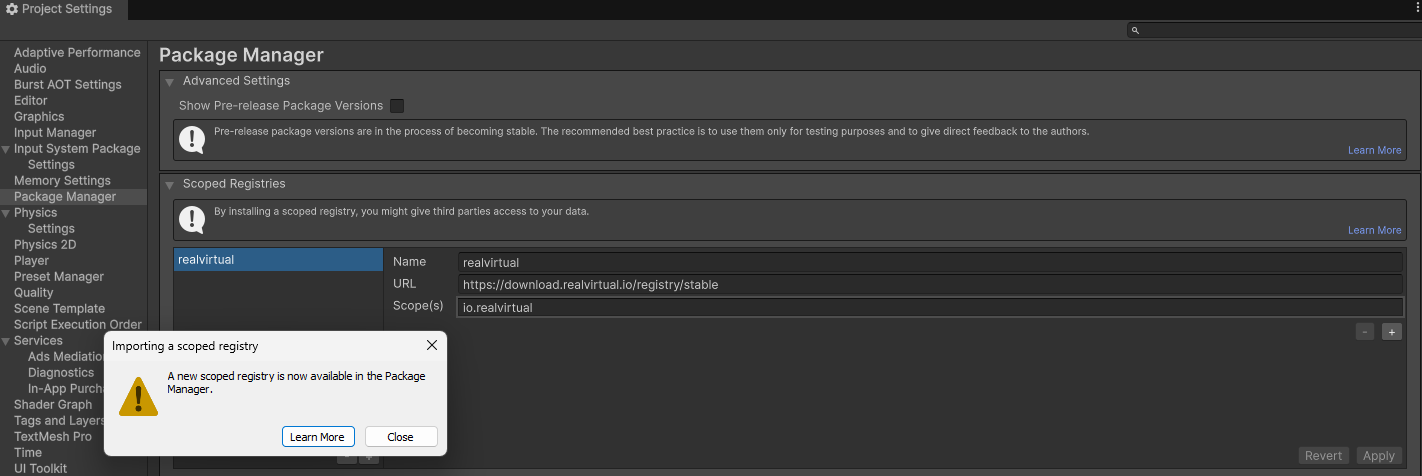
Scoped registry added to Project Settings
- Future updates will now appear automatically in the Package Manager under My Registries. Use Check for Updates in User Hub to verify.
Manual Updates via Tarball
Section titled “Manual Updates via Tarball”Alternatively, you can download newer versions from the Downloads tab in User Hub (or from the Customer Portal) and install them via Install package from tarball as described above.
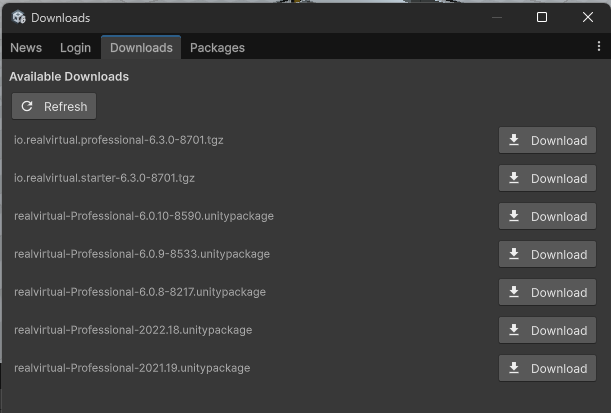
Download packages from the User Hub Downloads tab
Step 4: Handle Signature Warnings
Section titled “Step 4: Handle Signature Warnings”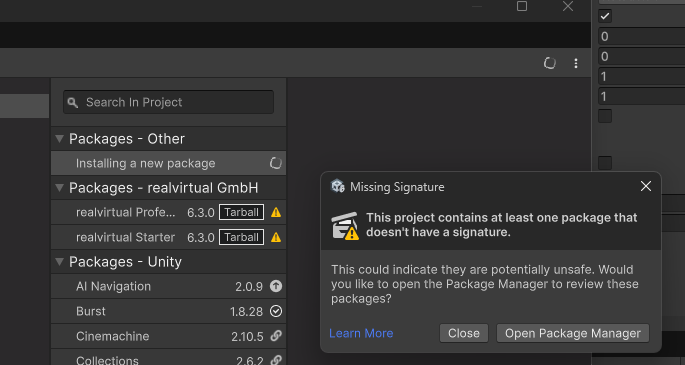
Missing Signature warning — safe to close
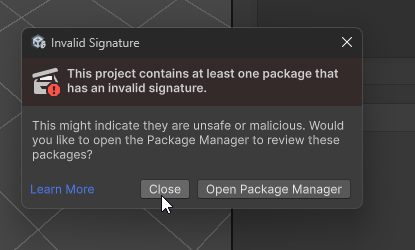
Invalid Signature warning — safe to close
Step 5: Import Demo Scenes
Section titled “Step 5: Import Demo Scenes”After installation, a dialog will ask if you want to import the Getting Started demo scene. Click Import Now to get started right away.
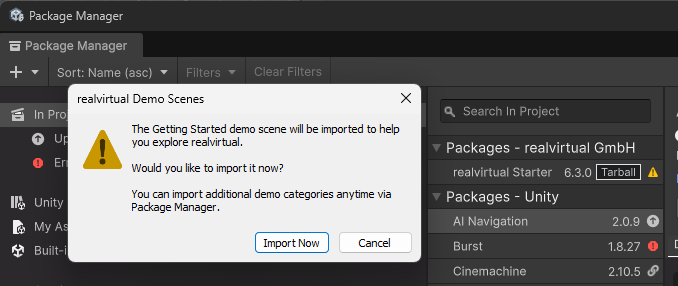
Import the Getting Started demo scene
You can import additional demo categories at any time using two methods:
Via Package Manager: Select realvirtual Starter (or Professional) in the Package Manager, go to the Samples tab, and click Import for the demo categories you want.
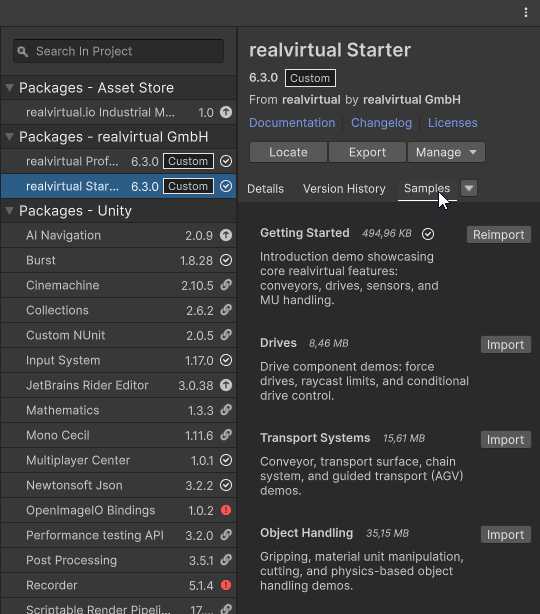
Import demo scene categories from the Samples tab
Via Demo Scenes Browser: Go to Tools > realvirtual > Demo Scenes Browser in the Unity menu. This window shows all available demo scenes organized by category with descriptions.
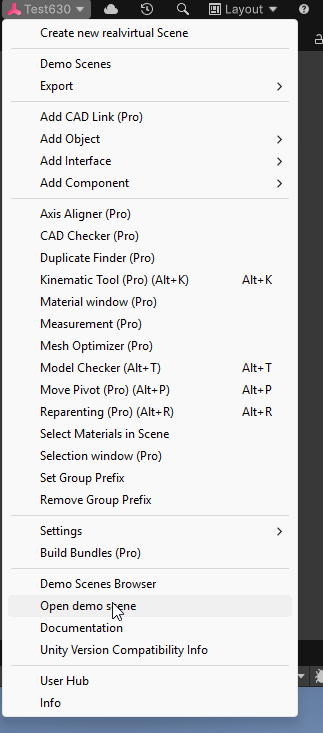
Open Demo Scenes Browser from the realvirtual menu
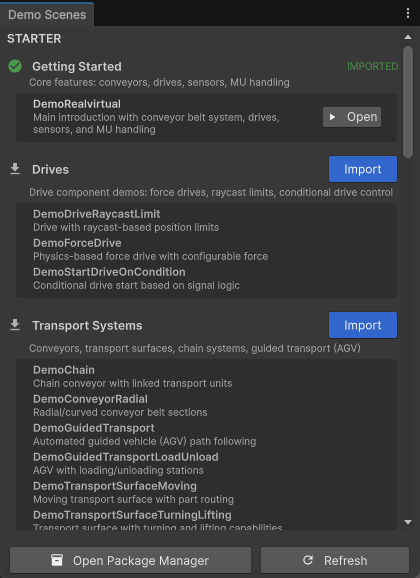
Demo Scenes Browser with categories and scene descriptions
Step 6: Explore the Demo Scene
Section titled “Step 6: Explore the Demo Scene”The Getting Started demo scene opens automatically after import. It showcases a complete automation cell with conveyors, a robot, sensors, and a machine — all working together.
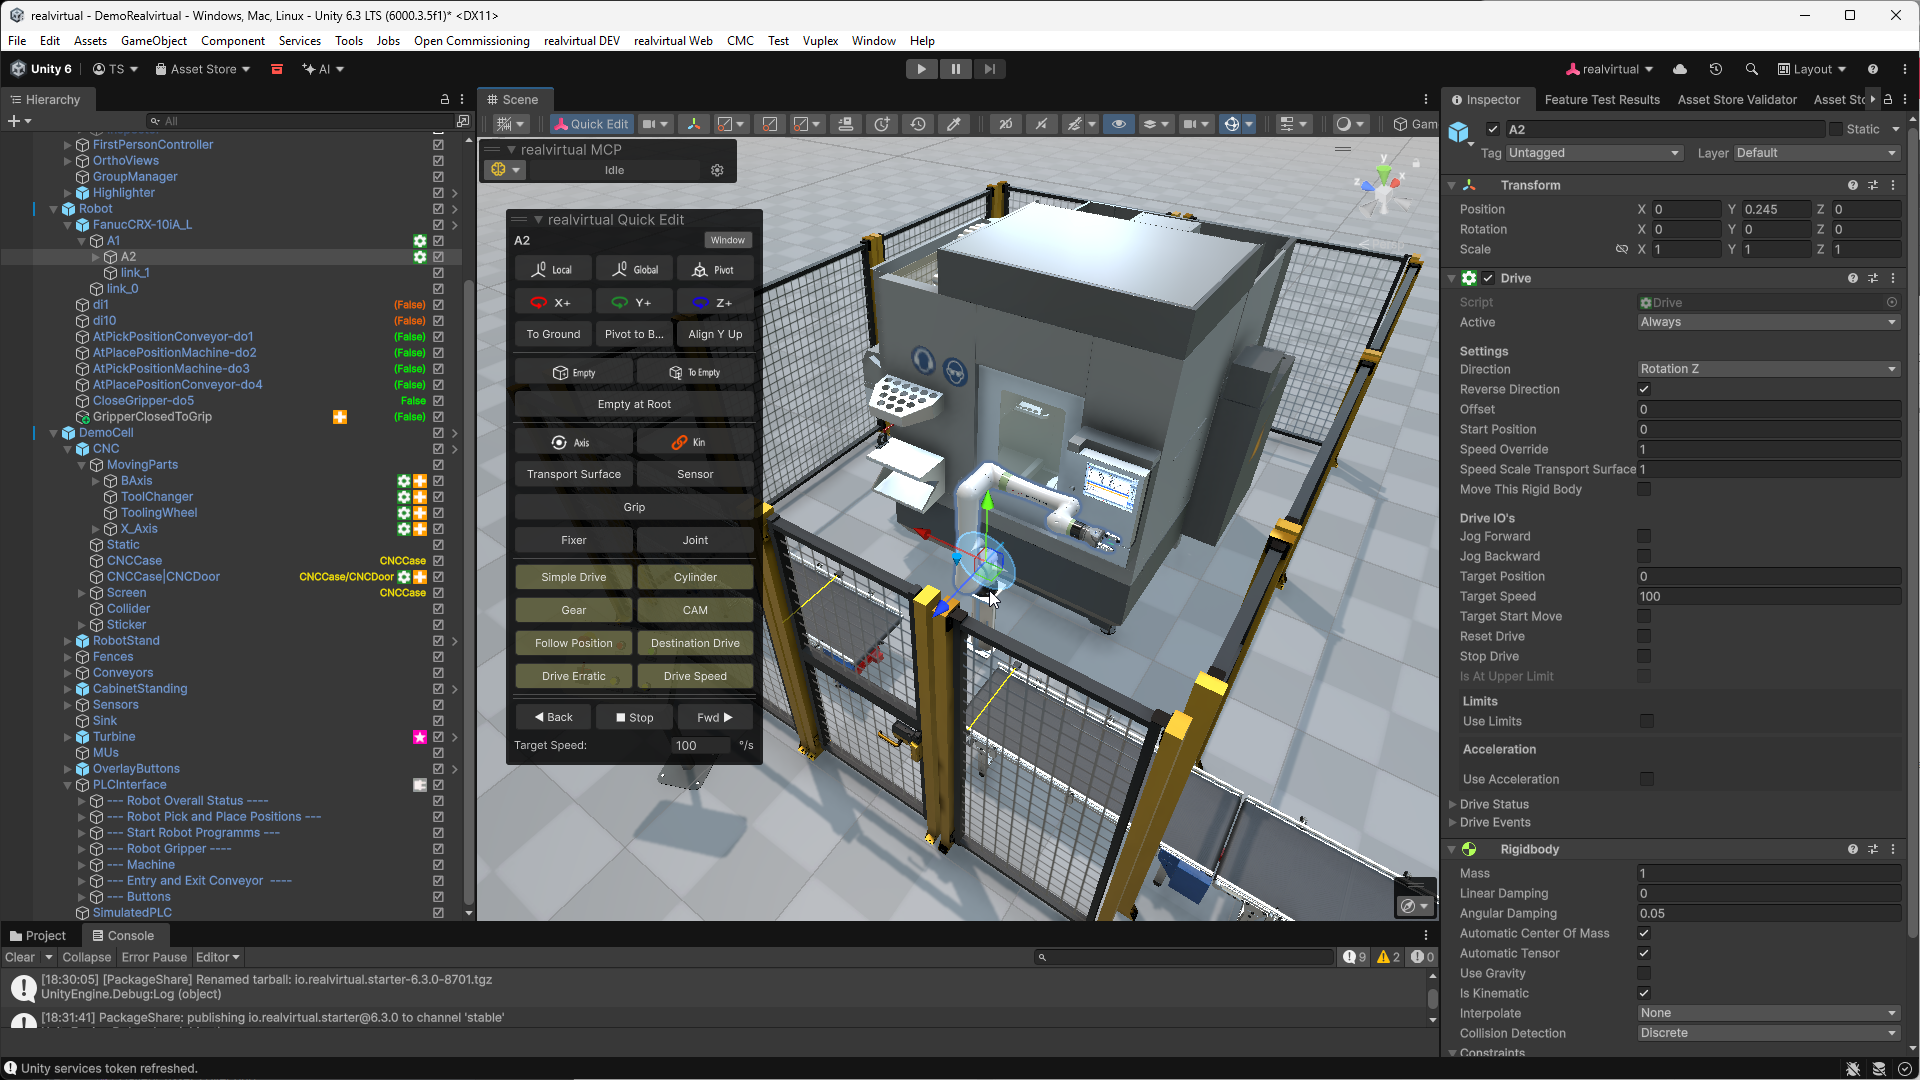
realvirtual 6.3 demo scene
Press Play in the Unity Editor to start the simulation and see the automation in action.
Possible Problems and Fixes
Section titled “Possible Problems and Fixes”Wrong Input System
Section titled “Wrong Input System”If you see red error messages in the Console related to the Input System, make sure that the Active Input Handling in Project Settings > Player > Configuration is set to Both (old and new Input System).
Wrong Render Pipeline
Section titled “Wrong Render Pipeline”If your demo scene appears pink, you may be using the wrong render pipeline. We recommend switching to the Universal Render Pipeline (URP). See Render Pipelines for details.
TextMesh Pro Essentials Not Imported
Section titled “TextMesh Pro Essentials Not Imported”If you encounter problems with text in the Runtime UI, go to Window > TextMeshPro > Import TMP Essential Resources to install the required components.
(Optional) Clean Up Unnecessary Unity Demo Folders
Section titled “(Optional) Clean Up Unnecessary Unity Demo Folders”To keep your project clean, you can delete Unity’s default demo assets if present:
- Scenes
- Settings
- TutorialInfo
Upgrading from realvirtual 6.0 to 6.3
Section titled “Upgrading from realvirtual 6.0 to 6.3”If you have an existing project using realvirtual 6.0.x (the .unitypackage version), follow these steps to migrate to the new UPM package format.
Step 1: Upgrade Unity to 6.3 LTS
Section titled “Step 1: Upgrade Unity to 6.3 LTS”- Open Unity Hub and change the Editor Version of your project to 6000.3 (Unity 6.3 LTS).
- Accept any compatibility warnings and let Unity convert your project.
Step 2: Remove the old realvirtual folder
Section titled “Step 2: Remove the old realvirtual folder”- Close Unity completely.
- Delete the Assets/realvirtual folder from your project directory (this is the old
.unitypackagecontent). - Delete the Library folder to force Unity to regenerate all cached metadata.
Step 3: Install the UPM packages
Section titled “Step 3: Install the UPM packages”- Reopen your project in Unity 6.3 LTS. You will see compilation errors — this is expected.
- Install the new UPM packages following Step 3 from the installation instructions above (either via Asset Store or Customer Portal tarball).
- After the packages are installed, compilation errors should be resolved.
Step 4: Verify the upgrade
Section titled “Step 4: Verify the upgrade”- Check the Console window for any remaining errors.
- Open one of your scenes and verify that all components, references, and materials are intact.
- If materials appear pink, go to Tools > realvirtual > Settings > Switch to Universal Render Pipeline (URP) to convert them.
realvirtual.io 6.0 (Unity 6 — .unitypackage)
Section titled “realvirtual.io 6.0 (Unity 6 — .unitypackage)”Step 1: Install Unity 6 LTS
Section titled “Step 1: Install Unity 6 LTS”Install Unity 6000.0 LTS (Unity 6) through the Unity Hub.
Step 2: Create a New Unity Project
Section titled “Step 2: Create a New Unity Project”- Open Unity Hub.
- Select Universal 3D under Core templates.
- Ensure Editor version 6000.0 LTS is selected.
- Click Create Project.
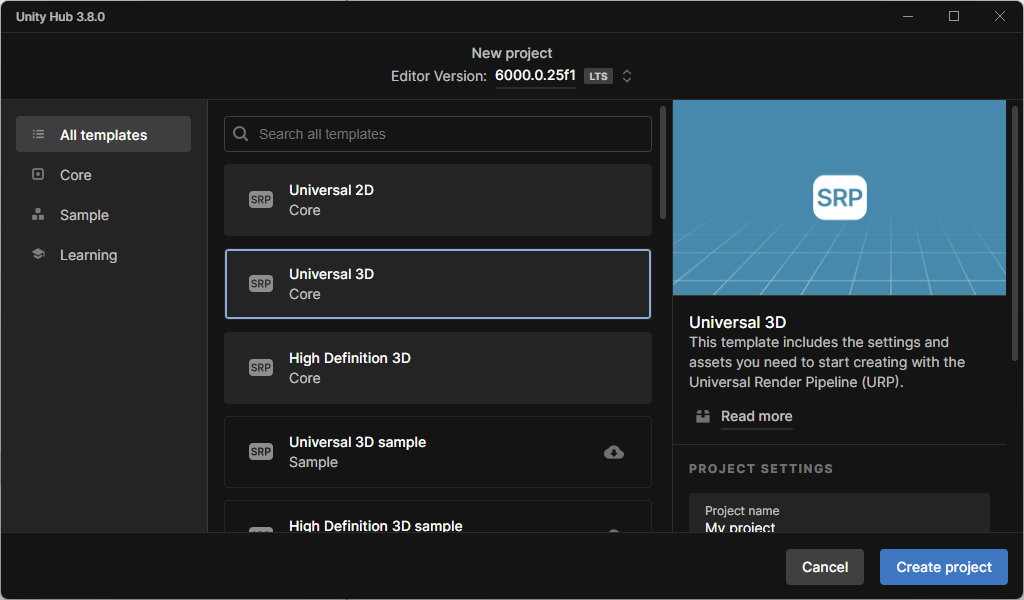
Step 3: Install realvirtual.io 6
Section titled “Step 3: Install realvirtual.io 6”- Direct Purchase from realvirtual.io:
- Download the
realvirtual.unitypackagefile from your account on the realvirtual.io download website. - Drag and drop the file into the Unity Project window, or go to Assets > Import Package > Custom Package.
- Download the
- Unity Asset Store:
- Open Window > Package Manager.
- Under My Assets, locate realvirtual.io 6 and click Download, then Import.
When prompted about a URP Upgrade, select Install / Upgrade.
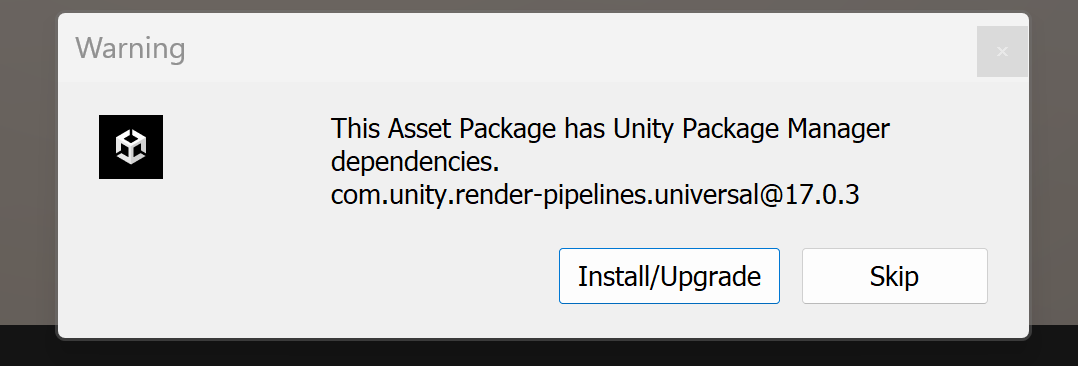
Installation Warning
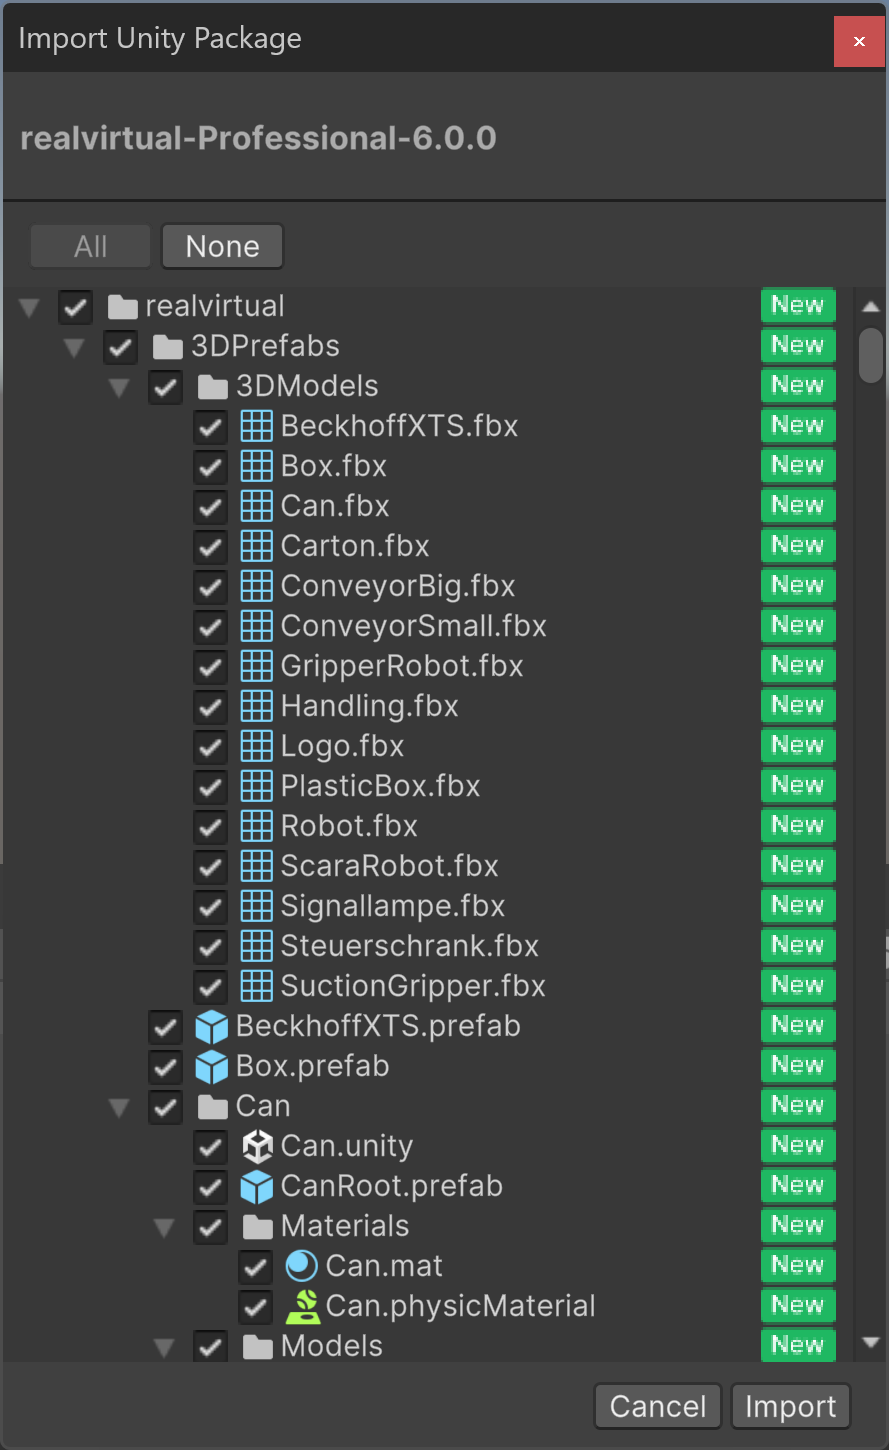
Import Unity Package
After import, the demo scene opens automatically.
Demo scene after installation
Possible Problems and Fixes
Section titled “Possible Problems and Fixes”See the problems and fixes section above — the same issues and solutions apply.
realvirtual.io 2022 and before
Section titled “realvirtual.io 2022 and before”1. Install Unity
Section titled “1. Install Unity”If you haven’t already, install Unity on your computer. Unity offers both free and licensed versions, depending on your use case. Check Unity’s official website here to determine which version suits your needs.
Our new releases is always based on the latest Unity Long Term stable release. Our main version number (e.g. 6) always corresponds to the Unity version number. For example to run realvirtual.io 2022.09 you need Unity 2022.03 LTS.
2. Unity Hub (Recommended)
Section titled “2. Unity Hub (Recommended)”We highly recommend installing Unity Hub, a tool that simplifies managing multiple projects and Unity installations. You can download Unity Hub from Unity’s official download pages.
3. Create a New Project
Section titled “3. Create a New Project”Launch Unity and create a new empty project by selecting “New.” Choose a location on your computer to store your project files and give your project a name. Then, click “Create Project.”
When prompted to choose a template, select the standard 3D template. This will form the foundation of your project:
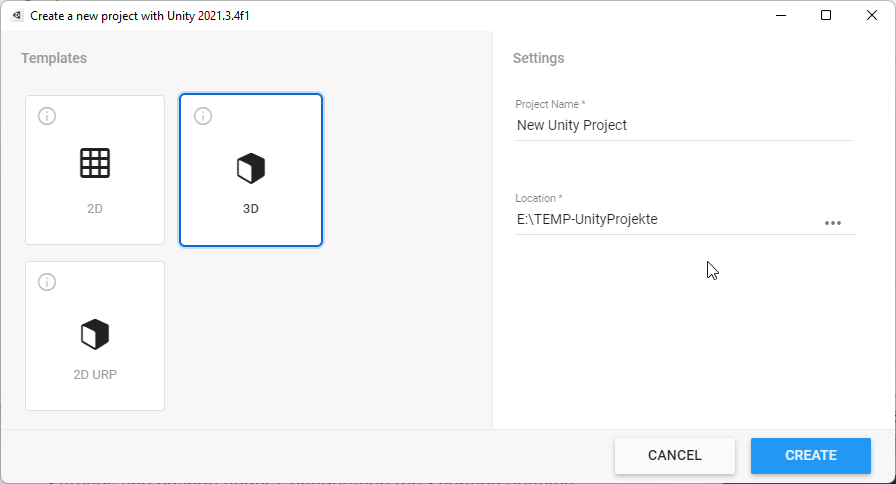
Creating a new Unity Project with the Unity Hub
5. Ensure .Net Standard Framework 2.1 and Mono are Enabled
Section titled “5. Ensure .Net Standard Framework 2.1 and Mono are Enabled”By default, Unity should have .Net Standard 2.1 and Mono enabled. However, in some cases, especially when integrating realvirtual.io into an older project, this setting might be incorrect. To confirm or change this setting:
- Go to Player Settings by selecting “Build Settings” > “Player Settings.”
- Under “Configuration,” change the Scripting Runtime Version to ”.NET Standard 2.1”
For the scripting backend, it’s recommended to start with Mono rather than IL2CPP, as Mono typically compiles much faster.
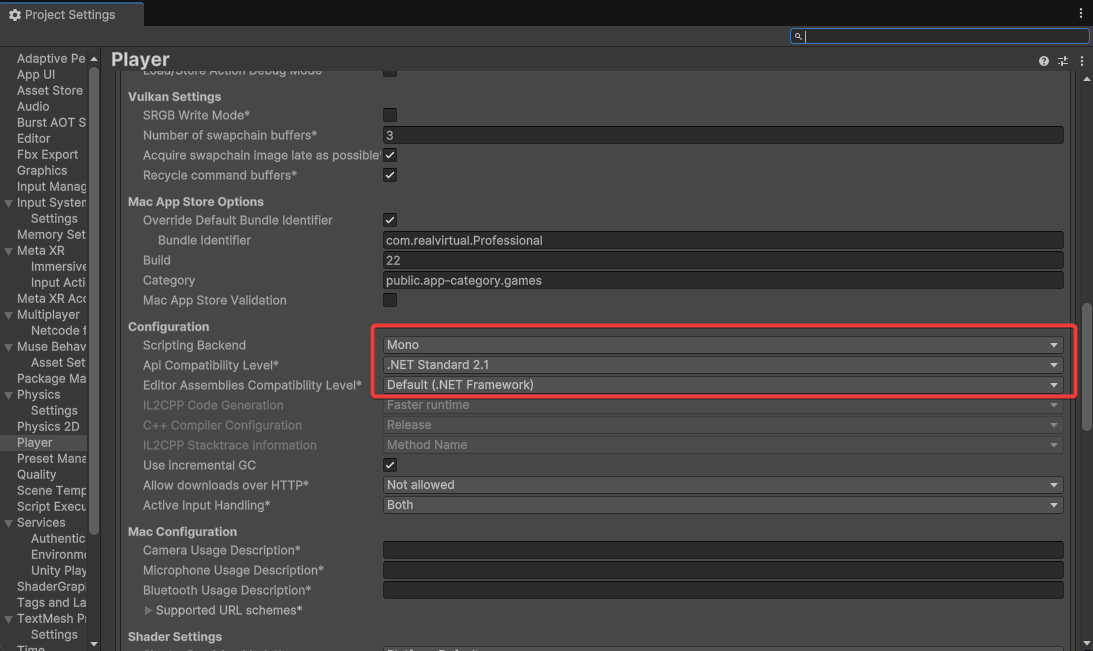
Selecting the .Net Standard 2.1 in the Unity Player Project Settings
6. Acquire realvirtual.io
Section titled “6. Acquire realvirtual.io”Go to the Unity Asset Store and purchase the version of realvirtual.io that suits your needs, whether it’s Lite or Professional.
7. Import realvirtual.io
Section titled “7. Import realvirtual.io”You can import realvirtual.io directly from the Unity Asset Store or manually download the asset. To install it manually, follow these steps:
- From the main menu, go to “Assets” > “Import Package” > “Custom Package…”
- A new window will appear, displaying the contents of the realvirtual.io package. Select “All” and click “Import.”
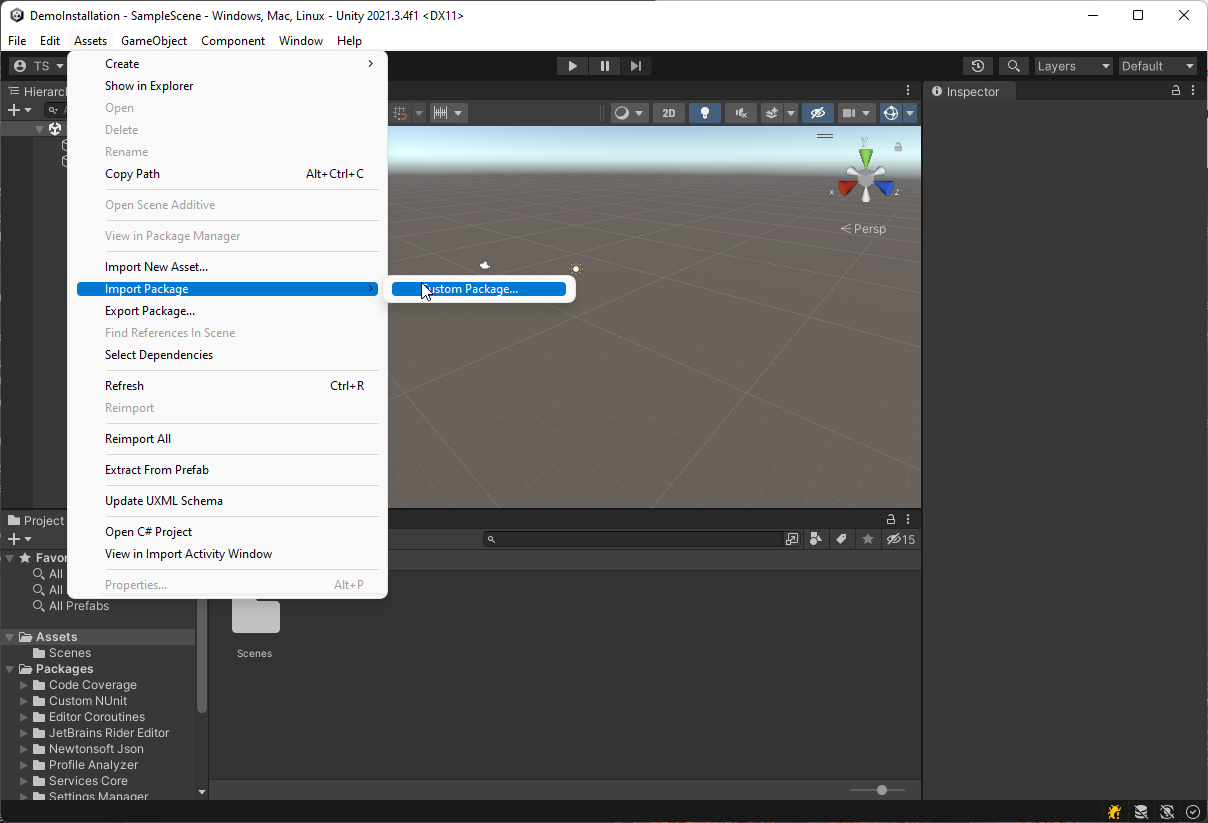
Import custom package
This will show a new window with all the realvirtual.io package contents:
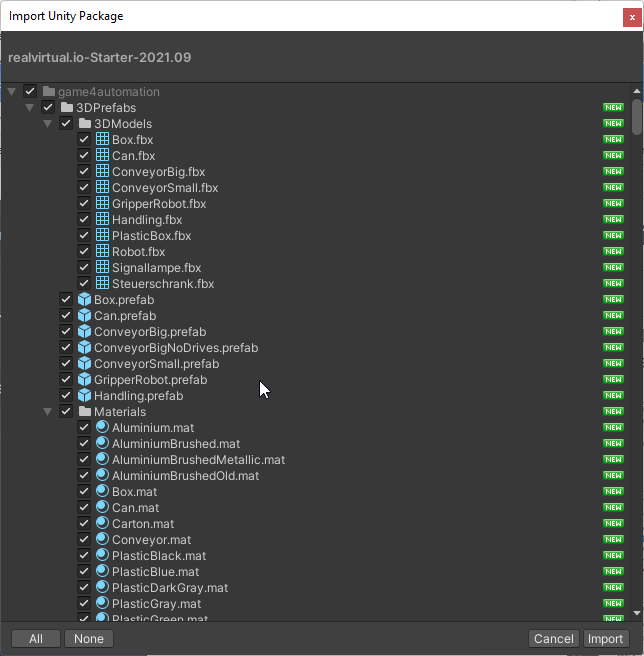
Please select All and Import.
8. Verify Installation
Section titled “8. Verify Installation”After importing the realvirtual.io package, check for the following:
- You should see an additional “realvirtual” folder (previously “game4automation” before 2022) in your project structure.
- A new “realvirtual” menu should be available in the main menu bar.
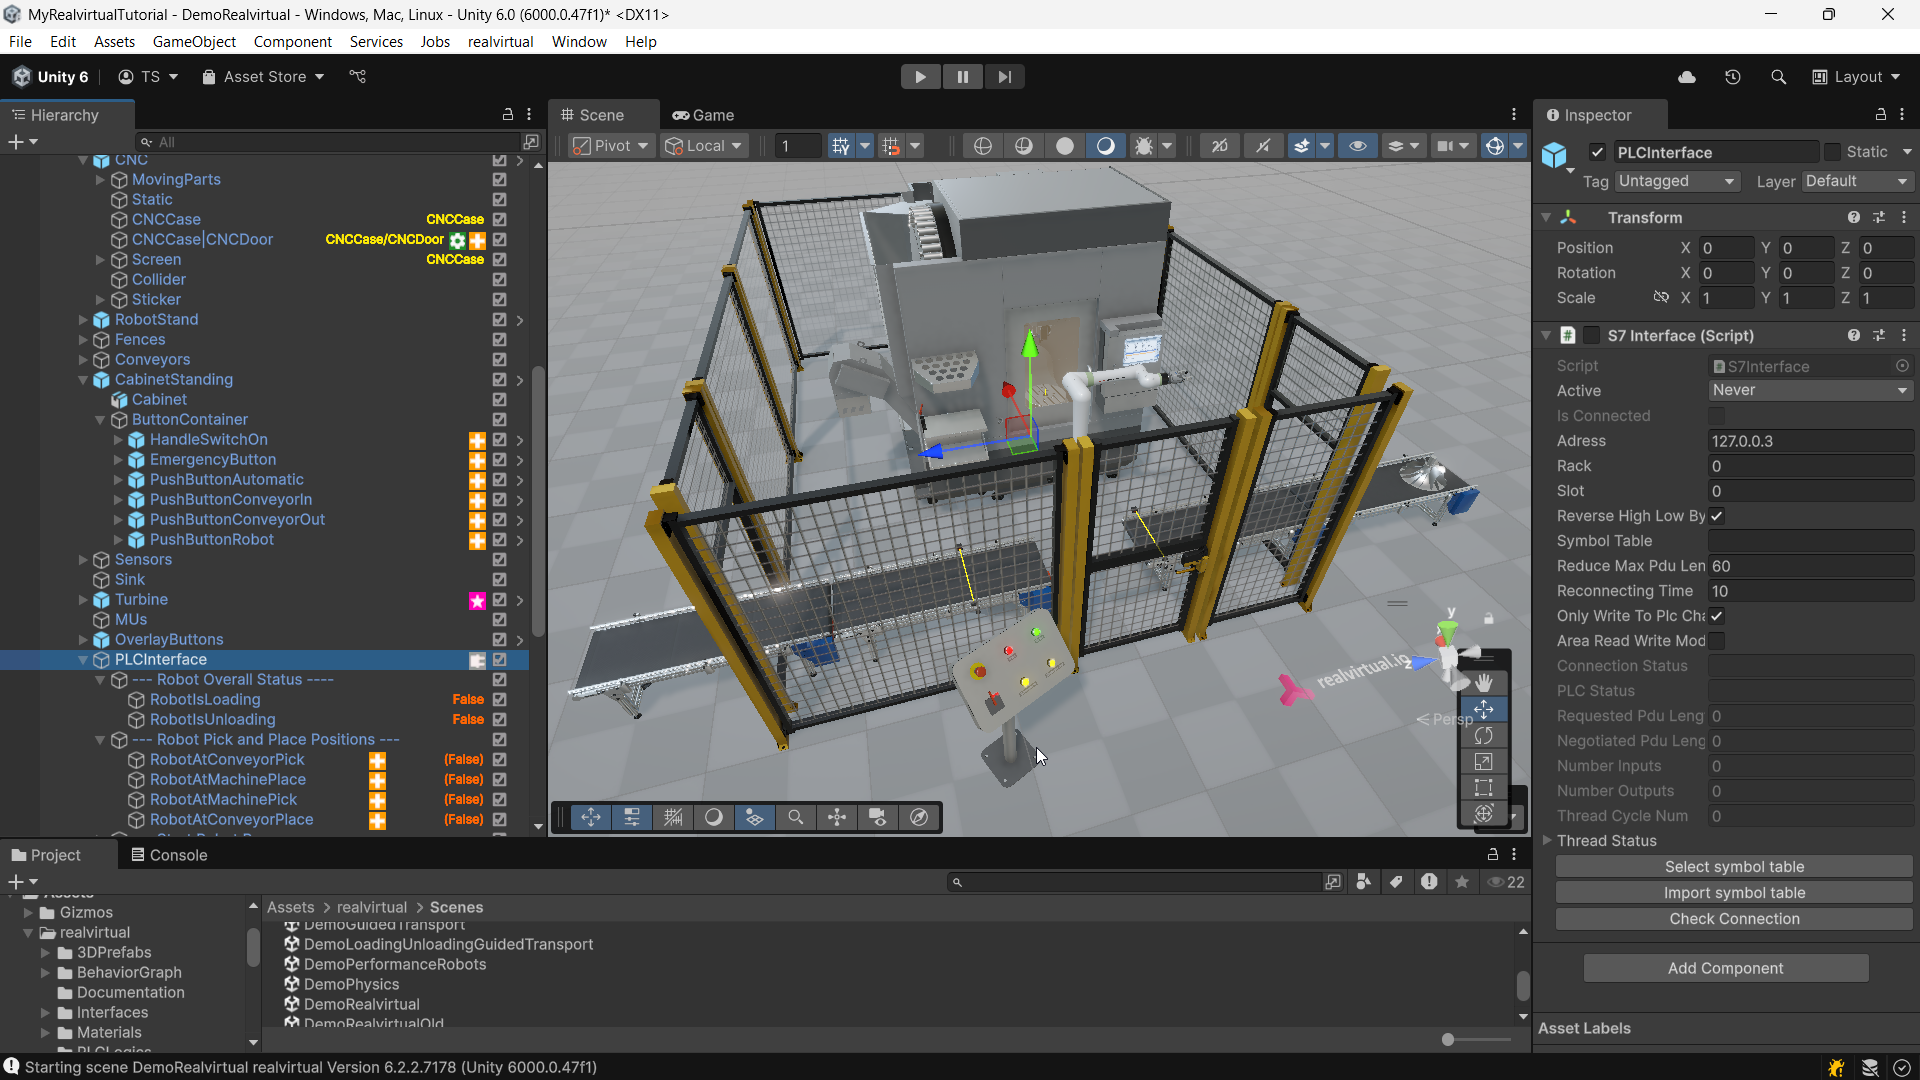
Project view after realvirtual.io installation
9. Set Standard Settings
Section titled “9. Set Standard Settings”In such cases:
- Address the compile errors first to ensure there are none remaining.
- Once errors are resolved, apply the standard settings by selecting “realvirtual” > “Apply Standard Settings” from the main menu.
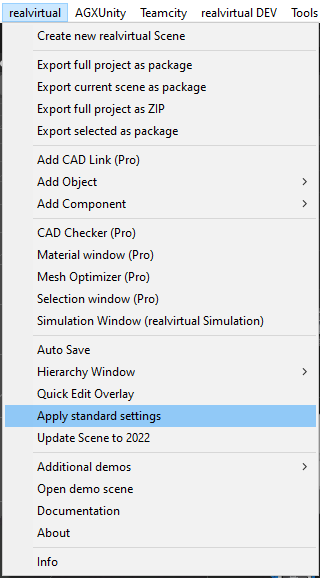
Applying standard settings will configure:
- Standard layer naming (for physics).
- Standard physics collision matrix.
- Standard light settings.
Congratulations! You’ve now completed the installation process and are ready to explore the Demomodel outlined in the documentation.